Brush Spacing

Brush Spacing controls how far apart each stamp of the brush is when you paint.
- Low Spacing: Makes the brush line look smooth and solid because the stamps are close together.
- High Spacing: Creates a dotted or textured effect because the stamps are farther apart.
You can adjust this by selecting the Brush tool, opening Brush Settings, and moving the Spacing slider to change how the brush looks when you draw.
Brush Size Jitter
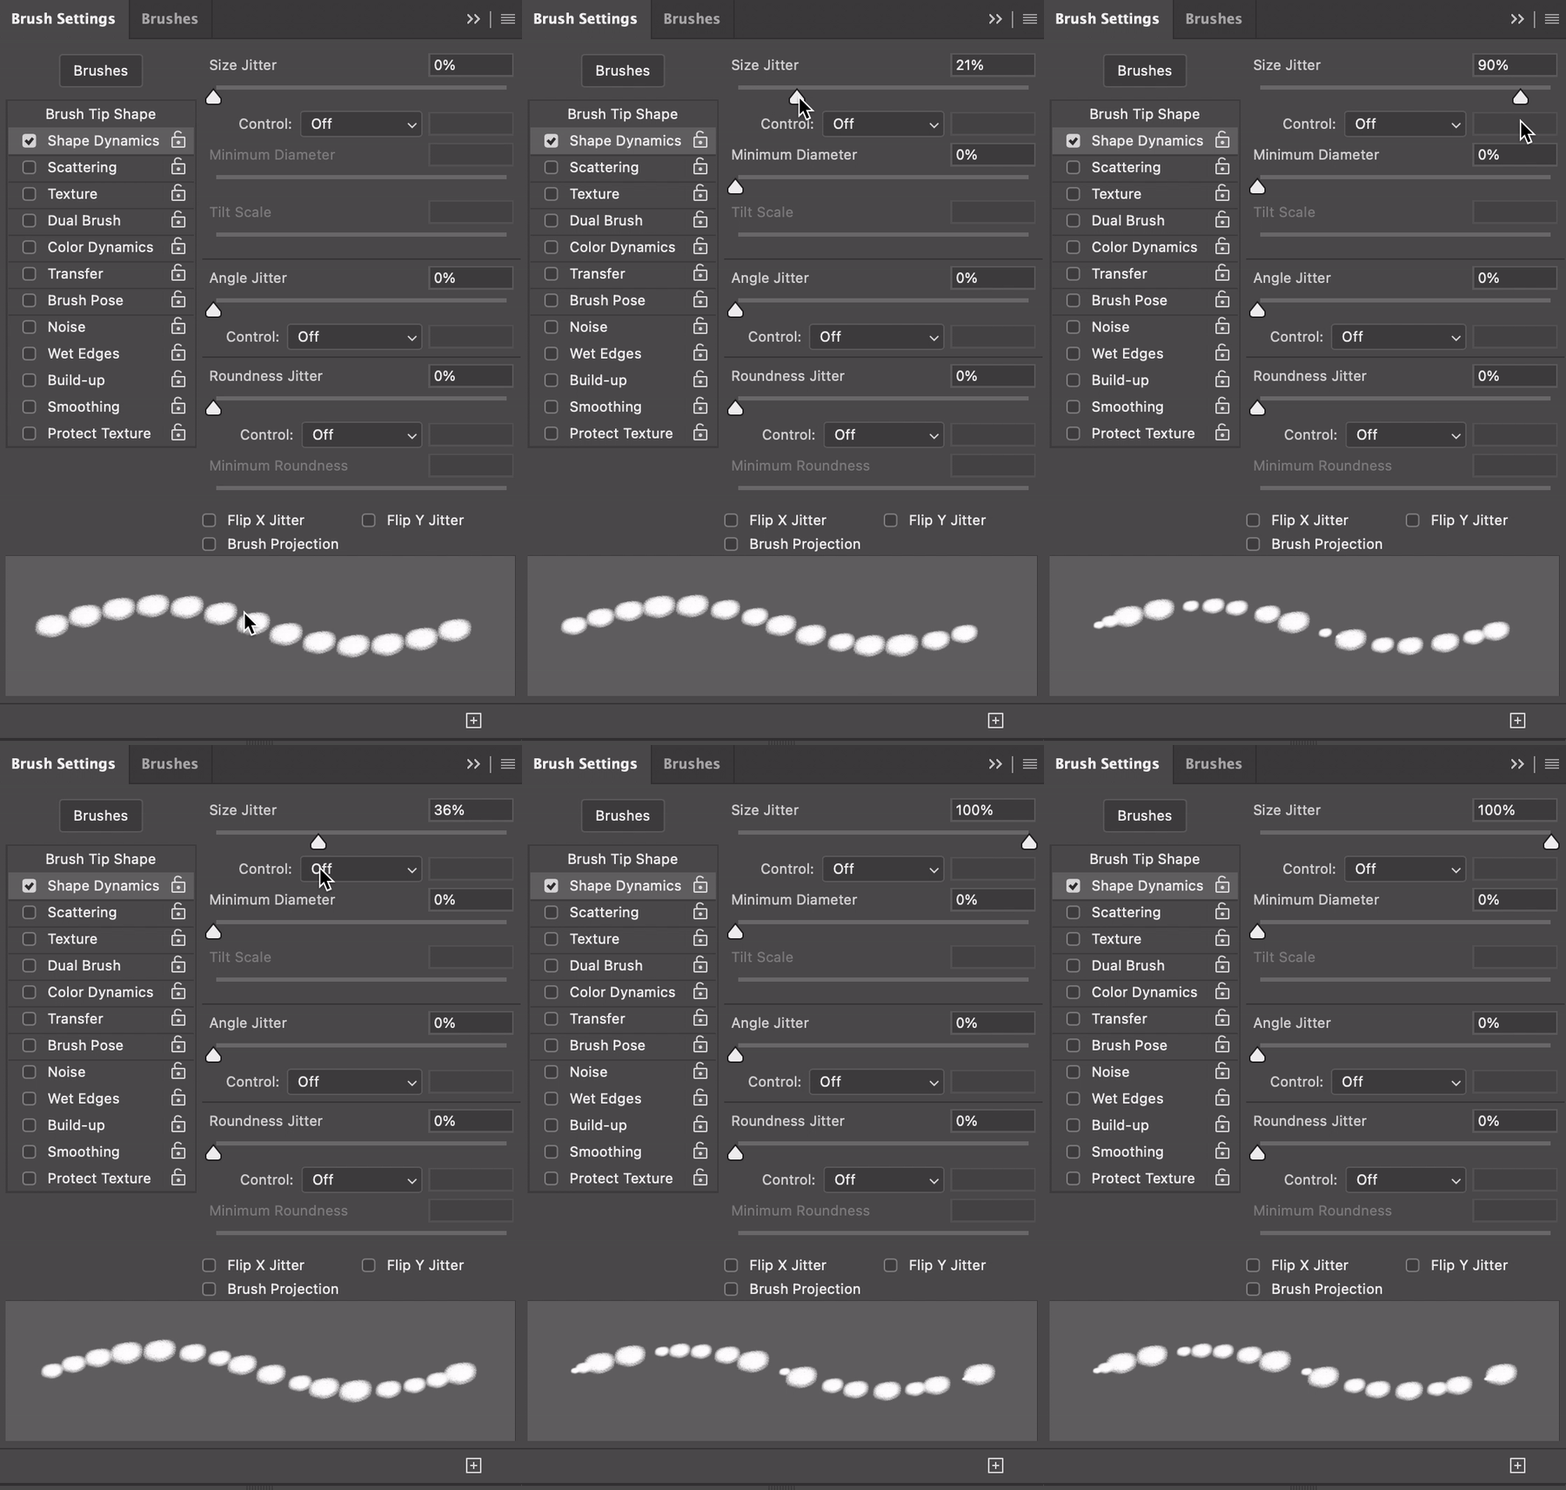
Size Jitter makes the brush stroke change size randomly as you paint.
- Low Size Jitter: The brush stays nearly the same size, with small changes.
- High Size Jitter : The brush changes size a lot, making the stroke look more varied and random.
You can find Size Jitter in the Brush Settings under Shape Dynamics. Adjust the Size Jitter slider to see how it affects your brush strokes.
Brush Angle Jitter
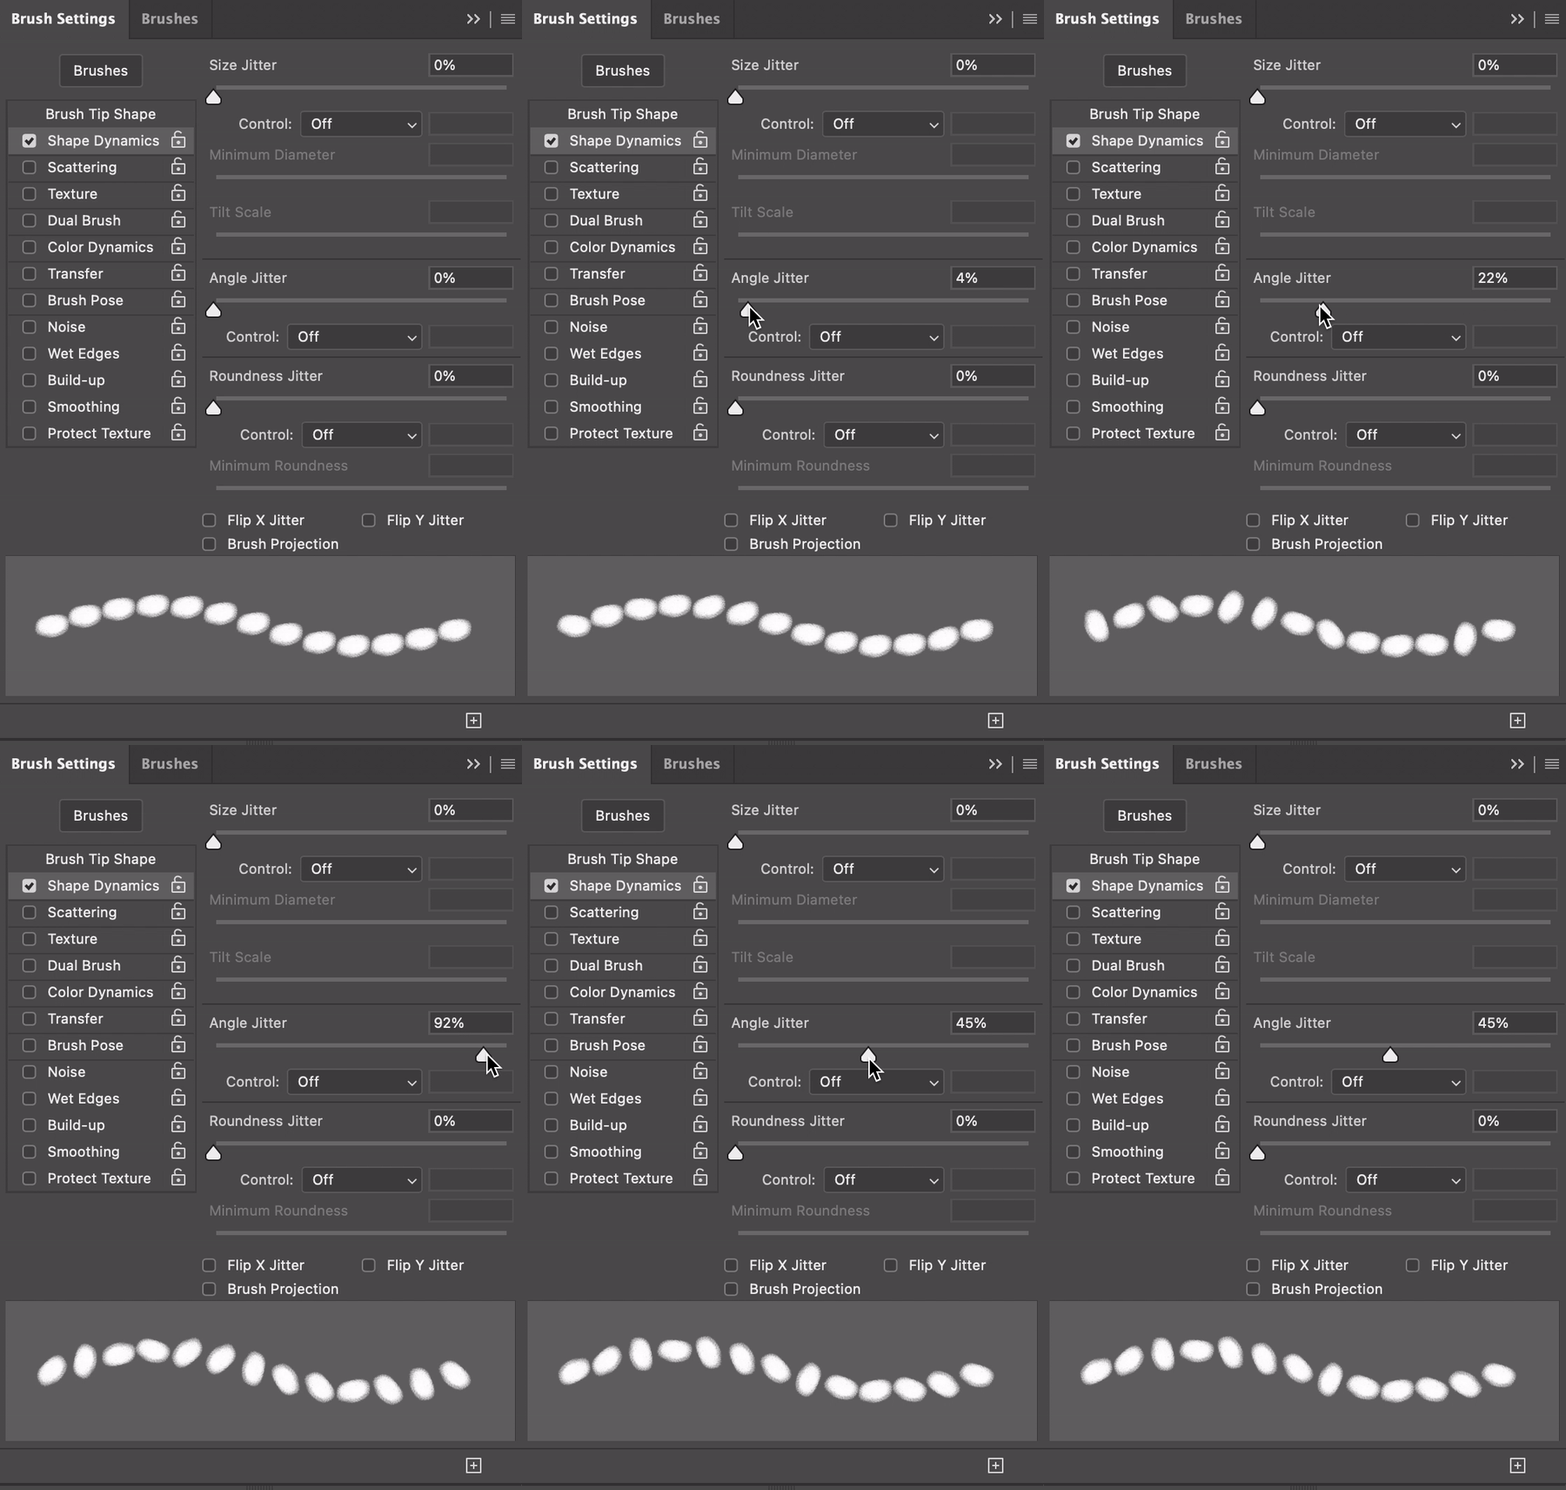
Angle Jitter randomly changes the angle (or direction) of the brush as you paint.
- Low Angle Jitter: The brush angle changes slightly, keeping most strokes in a similar direction.
- High Angle Jitter: The brush rotates a lot, creating random, more dynamic strokes.
You can adjust Angle Jitter in the Brush Settings under Shape Dynamics. Move the Angle Jitter slider to see how it affects the rotation of your brush as you draw.
Depth
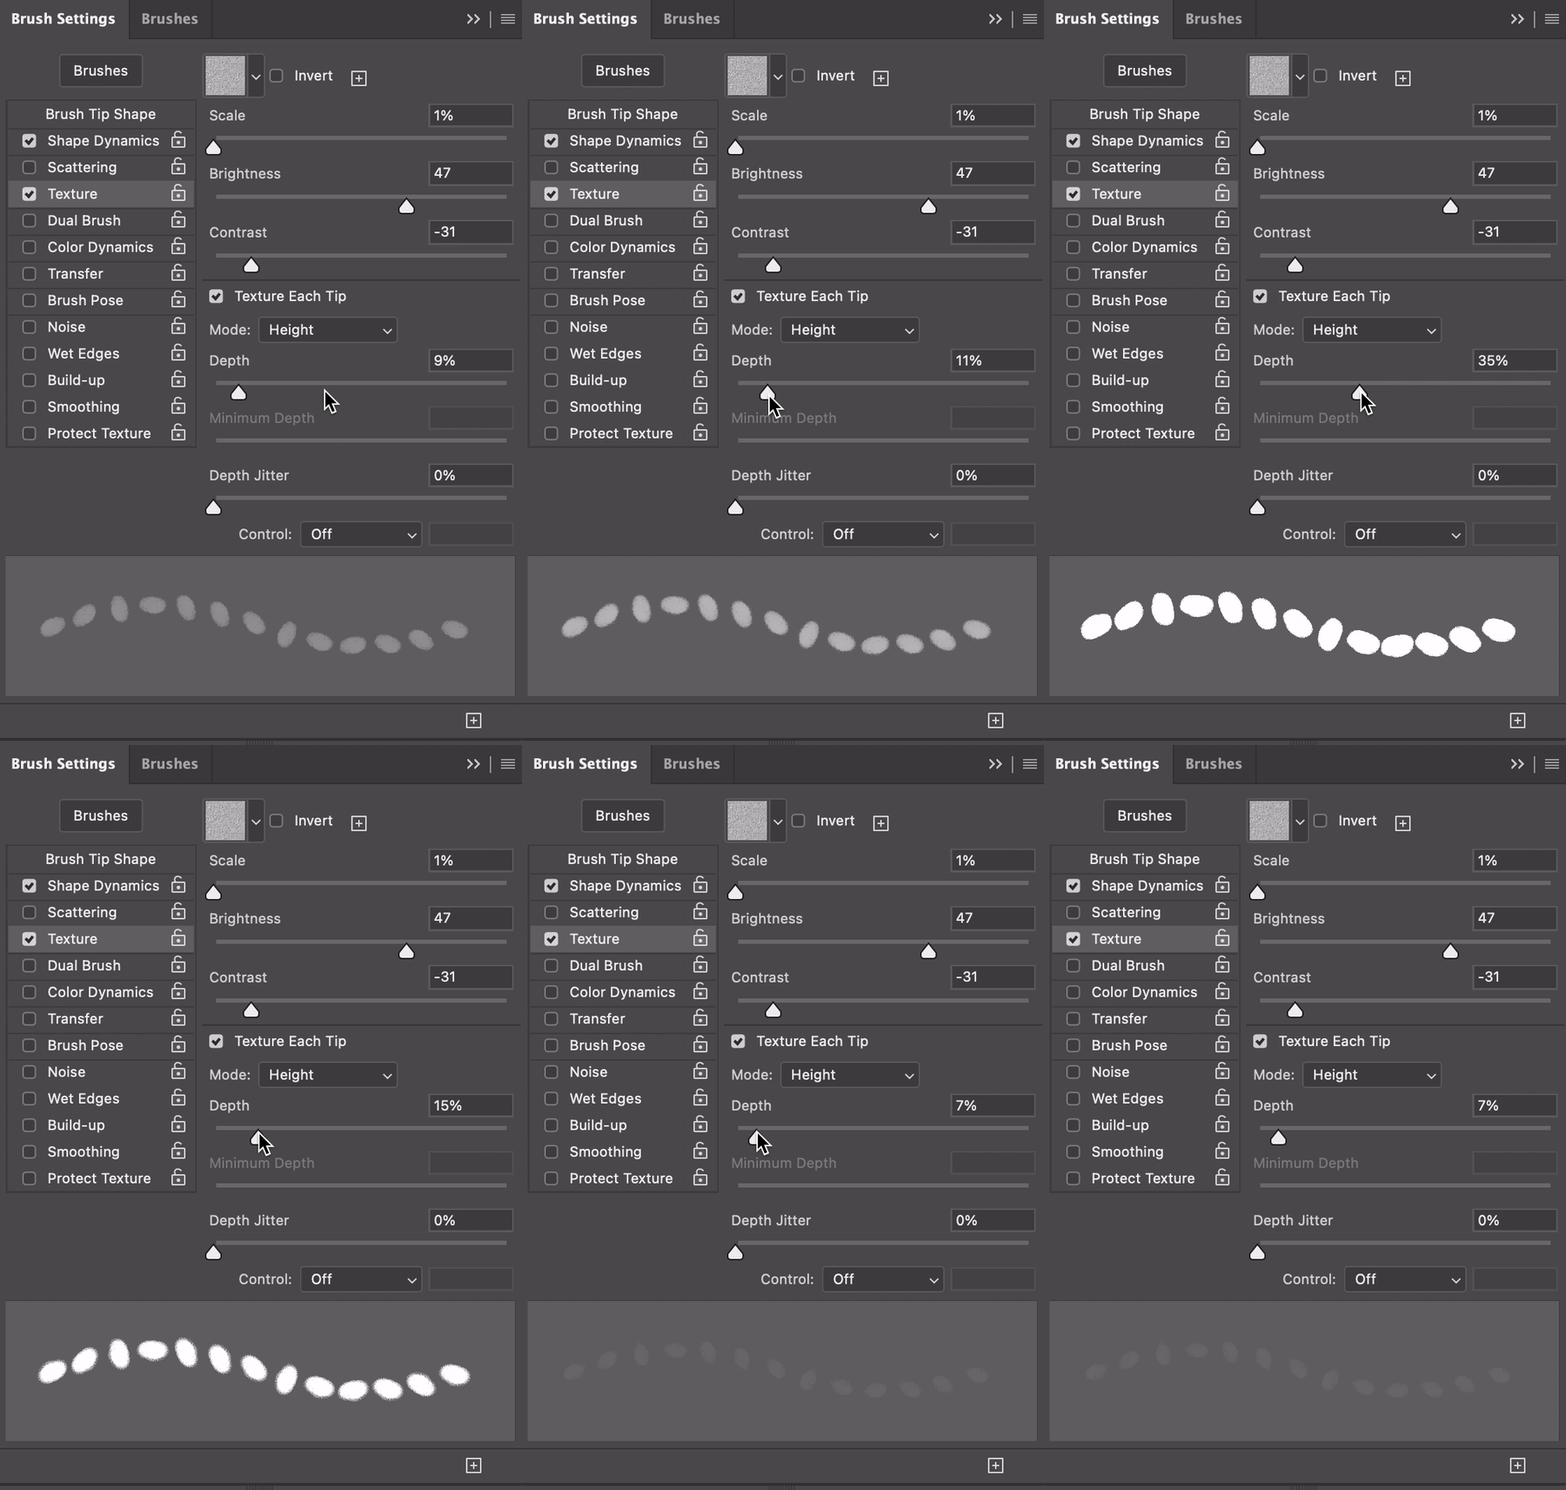
Depth controls how deep or strong the brush effect appears.
- Low Depth : Looks lighter and less intense, as if the brush is making a shallow mark.
- High Depth : More defined and intense, making the stroke appear deeper and stronger.
You can adjust Depth in the Brush Settings under Texture. Moving the Depth slider lets you control how strong or light the brush marks appear on your artwork.
Scattering in Photoshop
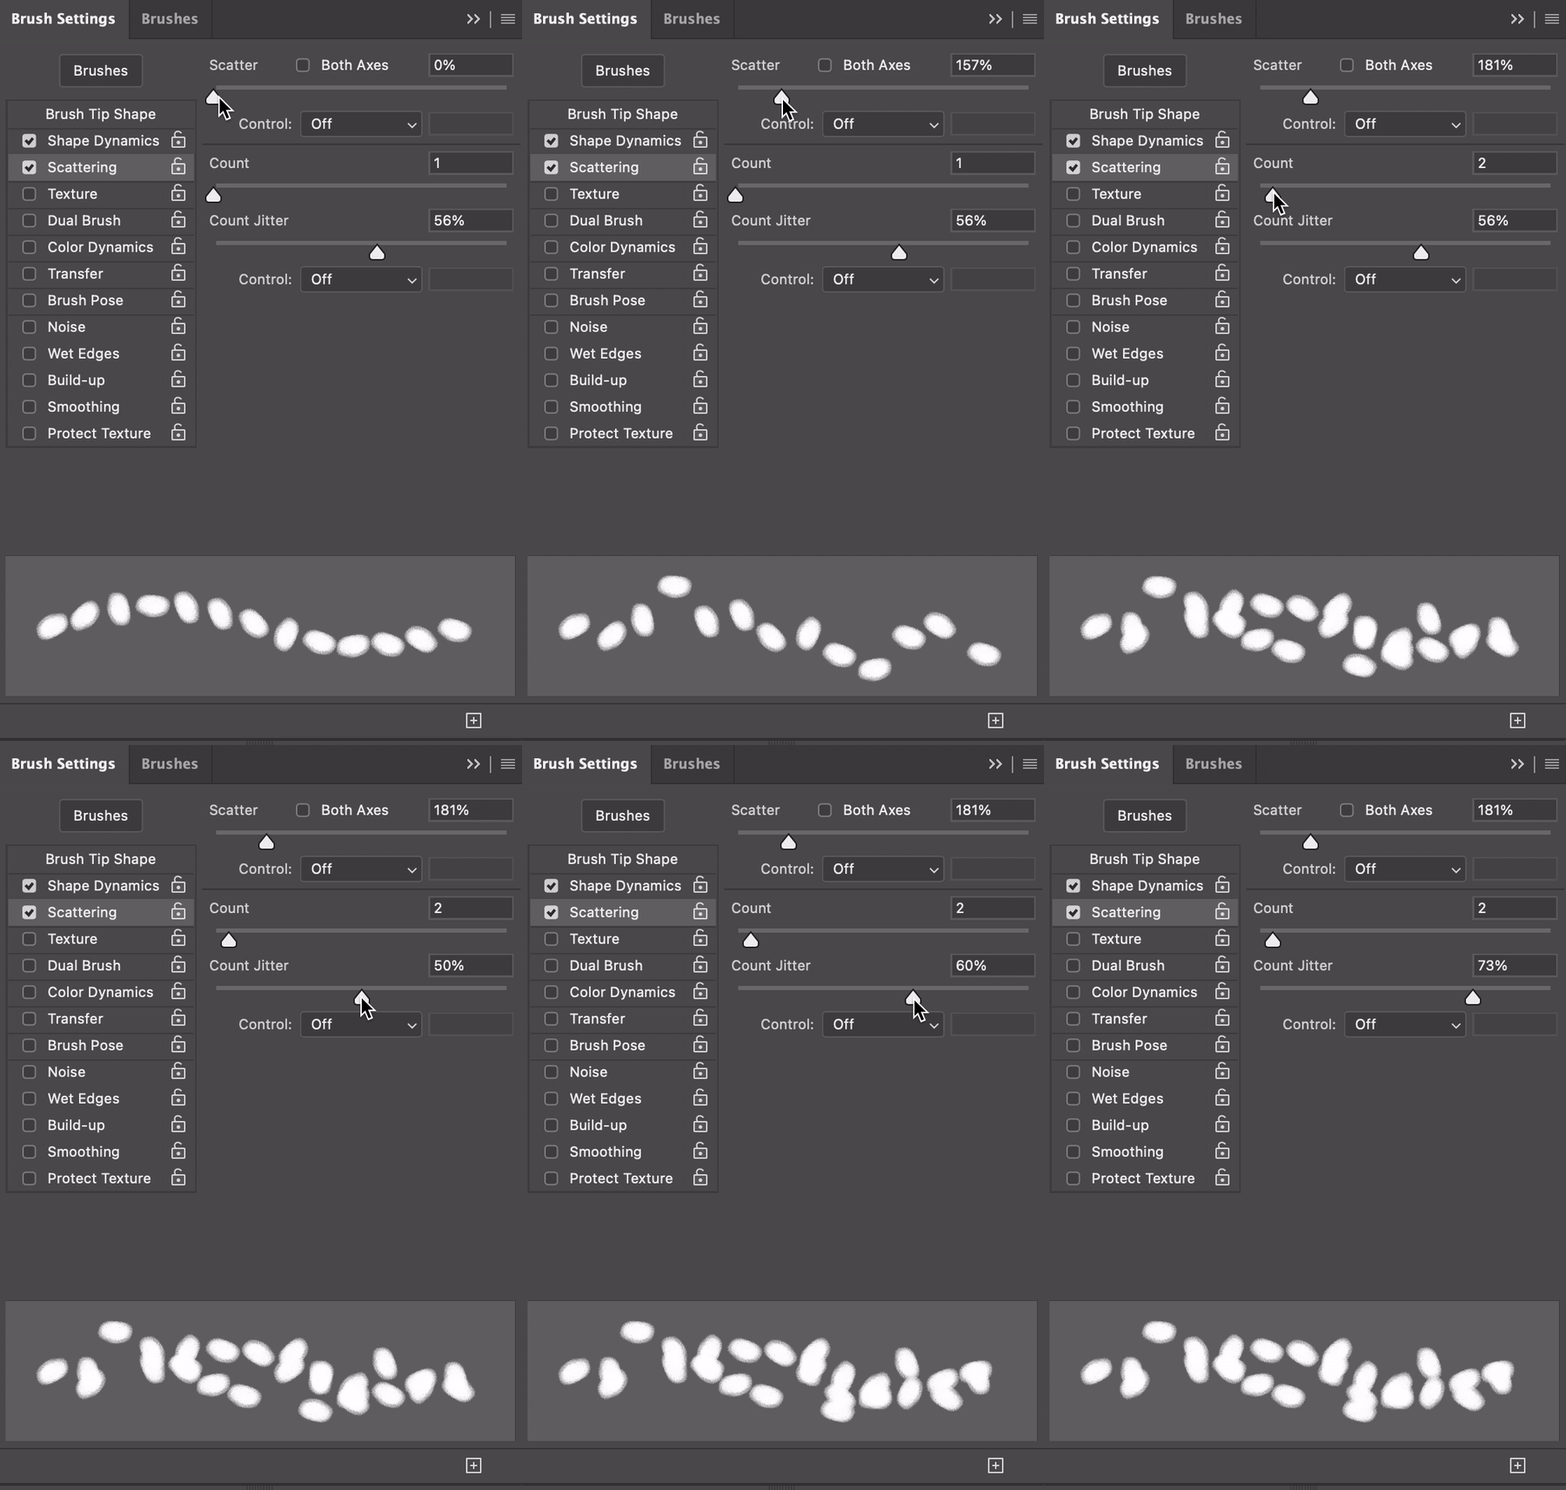
Scattering makes your brush strokes spread out randomly, creating a more scattered or splattered effect.
- Low Scattering: The brush stays close to the path you’re painting, with only a slight spread.
- High Scattering: The brush spreads out a lot, making the strokes look more scattered and random.
You can adjust Scattering in the Brush Settings. Move the Scattering slider to control how much your brush strokes spread out as you paint.
Dual Brush
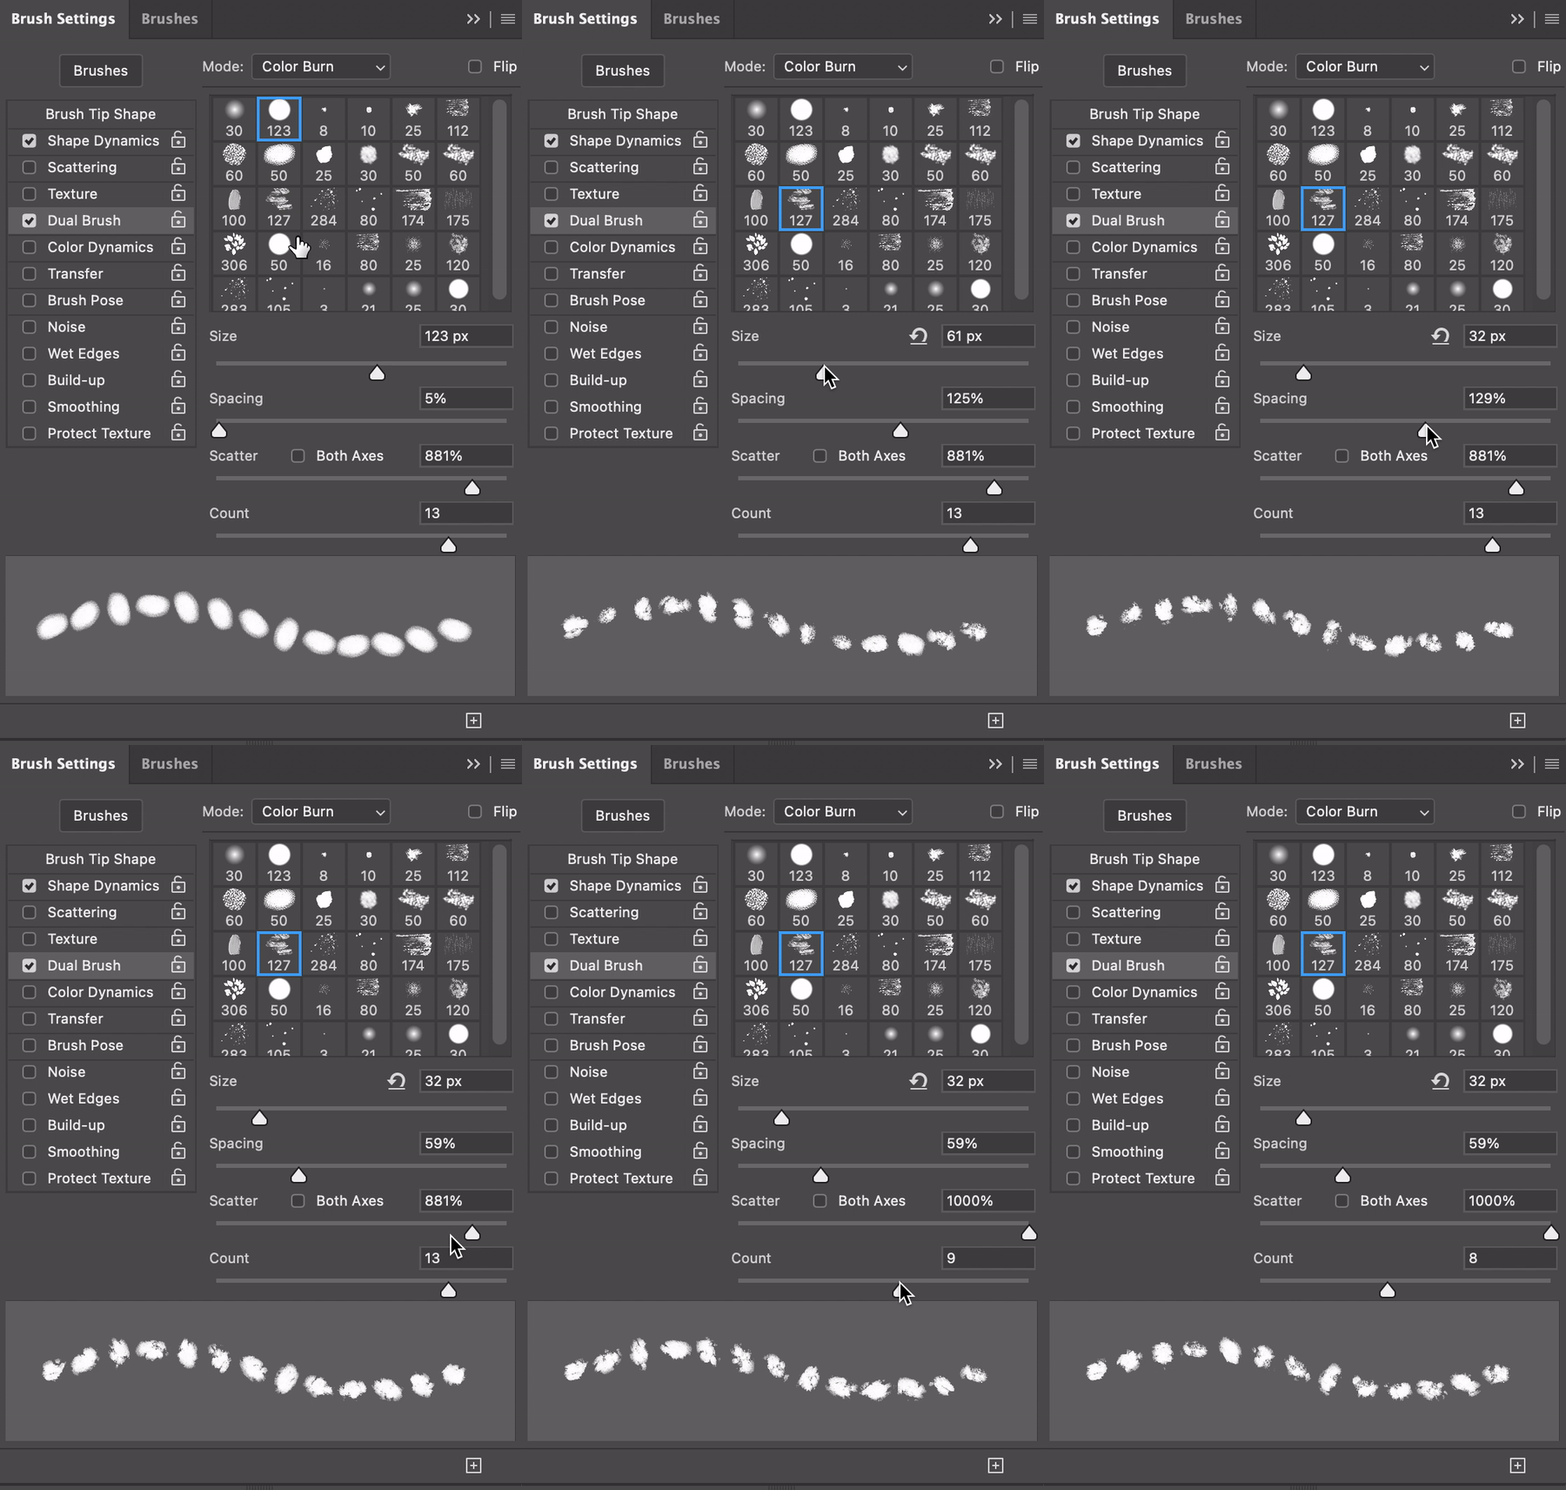
Dual Brush combines two different brushes to create more complex and unique brush strokes.
- Primary Brush: The main brush you select.
- Secondary Brush: This adds texture or shape to the primary brush, changing how it looks as you paint.
You can adjust Dual Brush in the Brush Settings. After selecting your main brush, go to Dual Brush and choose a second brush. You can also modify settings like Size, Spacing, and Scatter to customise the effect of the combined brushes.
Transfer

You can adjust Transfer settings in the Brush Settings panel. This feature helps make your strokes feel more natural and expressive by varying the amount of paint or transparency in each stroke.
Transfer controls how the brush’s opacity and flow change as you paint, allowing for softer or more intense strokes based on pen pressure or randomness.
- Opacity Jitter: This changes the transparency of your brush strokes.
- Low Opacity Jitter: The brush remains mostly opaque or transparent.
- High Opacity Jitter: The transparency varies a lot, making some strokes appear lighter or darker.
- Flow Jitter: This controls how much paint is applied at once.
- Low Flow Jitter: The strokes stay smooth and consistent.
- High Flow Jitter: The strokes vary in intensity, with some being stronger and others weaker.
- Pen Pressure/Control: If you’re using a graphics tablet, this lets you adjust opacity and flow based on how hard you press the pen.