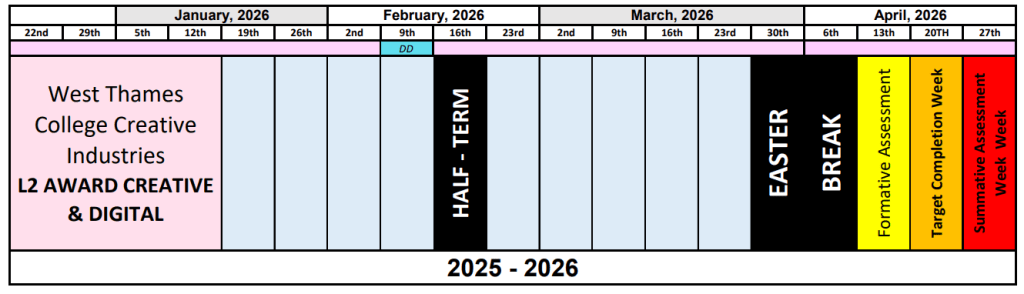
Week 11 – w/c 13th April
Welcome back to college everyone we hope you had a great two week break!
We are now in the 3 week assessment period of the course, this week your One Note checklist has been updated on Teams and you will be given a list of work that is outstanding for the course. You should continue to attend your lessons as per your timetable until all your work is fully completed please.
As part of your assessment you are required to sign an authentication form, please see below example. This is to agree that all your blog work is your own, and that if you have used AI to help you it has been referenced and used appropriately. Please see information sheet below.
Course checklist
Please see below course checklist, however you all have access to a personal checklist on Teams Note Book, please ask for help if you are unsure how to access it. Thank you and good luck!
Week 7 – w/c 9th March & Week 8 – w/c 16th March
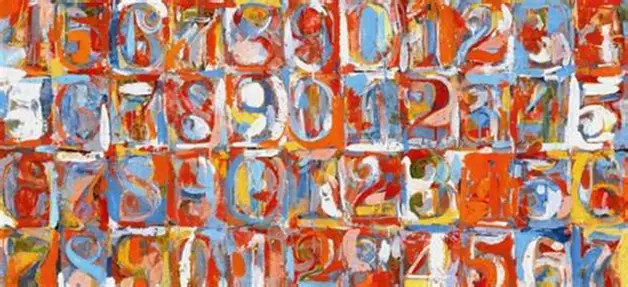
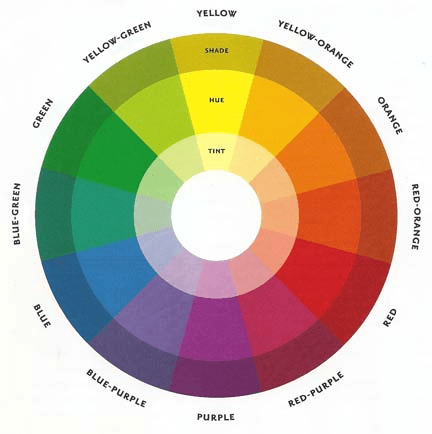
Hi All, we hope you have had a good week so far. For the next two weeks, we are going to look at another of the visual elements, COLOUR. We will explore some of the colour theories through a quiz and practical experiments to produce your own COLOUR WHEEL. We will then investigate the work of Jasper Johns through an artist discussion and a layered mixed media composition, which you will evaluate. Once you have finished, you will present all your work on your blog for assessment.
- Colour theory video & quiz
- Colour wheel practical
- Jasper Johns video & artist discussion
- Jasper Johns numbers mixed media practical task
- Jasper Johns numbers mixed media practical evaluation

- Update your blog with all work set for the course so far. Use checklist to help you, see top of this page.
Lesson Tasks
Colour theory quiz – what do you know?
Colour Wheel activity
Task 1
- On a palette squeeze out a small amount of the PRIMARY colours using Acrylic paint ( RED/YELLOW/BLUE) and fill in the middle sections on the colour wheel.
- Now using these colour only mix and fill in the SECONDARY colours (ORANGE/GREEN/VIOLET) in the middle section. Which colours do you mix together?
- Using the same colours you have mixed on your palette, create the range of TERTIARY colours and add these to you colour wheel, again in the middle sections.
TASK 2
- Now add some white and black paint to your palette
- Create a tint of each colour by adding a little white paint and adding it to the middle sections.
- Create tone of each colour by adding a little black paint to each colour and painting the outer sections.
Jasper Johns artist discussion
Jasper Johns Practical Task – Numbers Mixed Media Painting
Evaluation of Jasper Johns Practical Numbers Mixed Media Painting Task
Week 6 – w/c 2nd March
Hi L2 Award. This week you will reflect on how you are finding the course so far through a Padlet discussion activity. You will then continue working with your Klimt partner on finishing your pair pattern painting inspired by Gustav Klimt using acrylic paint. Once you have finished your painting, you will each need to complete an evaluation of the project, and will use the remainder of the session to upload photos of your planning sheets, painting and evaluation to your 2D blog page for assessment.
Janna & Anita
- Padlet Activity – How are you finding the course? Answer all 8 questions
- Complete A1 Klimt pair painting using visual elements colour, line & shape in the style of Klimt and the patterns he uses
- Final evaluation – Klimt painting
- Upload photos of all planning sheets, painting and evaluation to your 2D blog page – use B538
- Update your blog with all work set for the course so far. Use checklist to help you.
Lesson Tasks
Padlet Activity – How are you finding the course? Answer all 8 questions
Practical Task – Pair Painting Inspired by Gustav Klimt
Reminder of Instructions
- Working in your pairs plan what type of patterns/ symbols/ imagery/ people/animals you will be including in your painting. Look at Klimt’s artwork together. Decide on the colours you will be using too and who will be doing what – will you be working together on all parts? Plan this using pencil and a small piece of paper.
- Start drawing your design onto your A1 cartridge paper – this will be on a much larger scale compared to your plan!
- Then, using acrylic paint, start painting your piece.
- Ensure your piece looks cohesive and that you are working as part of a team.
- Remember to include the visual elements of colour, shape and line and lots of patterns.
- Remember to also take lots of progress photographs of your painting and you working on it from the beginning, the middle and at the end, to upload to your blog.
Painting Tips
- Roll your sleeves up and wear an apron to avoid paint staining your clothes.
- Squeeze only a small amount of paint out of its tube – a little goes a long way!
- Add a little water to your paint for a more translucent & smooth look. You may want to paint a wash first (a background).
- Mix primary paint colours (red, yellow, blue) together to create secondary colours (green, purple, orange).
- Add white to create lighter tones & highlights, and black for darker tones & shades.
- You don’t only need to use a brush to paint with – try other tools such as a sponge, spoon, side of piece of card, or even a stick! Experiment with different types of mark making too.
Final Evaluation
Weeks 3 & 5 – w/c 2nd Feb & w/c 23rd Feb (no 2D lessons in week 4 due to staff training day)
In weeks 3 & 5 you will explore the visual element of Pattern & Tone . You will also start painting your patterns piece inspired by Gustav Klimt. Remember, for your painting you will be working in complete collaboration with your partner to create a cohesive painting inspired by Klimt’s use of patterns, and you will consider the visual elements colour, shape and line in your artwork.
Before starting you will learn/recap all about using acrylic paint and pick up some tips on how to create a wash, how to make your own colours, how to blend and how to layer. You will have a chance to quiz yourselves too to test how much you have picked up/remembered!
Janna
Friday 6/02
- Pattern video & quiz
- Pattern experiments using Klimt imagery as inspiration
Friday 27/02
- Tone video & Quiz
- Tonal value experiment
- Continous line drawing
Anita
- Acrylic painting techniques & tips videos
- Acrylic painting quiz
- Start A1 Klimt pair painting using visual elements colour, line & shape in the style of Klimt and the patterns he uses
- Final evaluation – Klimt painting
In Lesson Tasks – Janna
Visual elements – Pattern video & quiz
Pattern experiments influenced by Klimt
- Looking at Klimt imagery to provide ideas & inspiration create an A3 sheet of patterns.
- Include at least 5 different pattern ideas – consider line, shape & colour in your work
- Consider motifs, repeat pattern and placement on the page.
- You may want to divide your page in sections or use a more organic structure
- Explore a range of media including colour pencil, soft pastel, oil pastel, ink, collage and paint.
- Remember to also take lots of progress photographs of your work using One Drive and to upload to your blog in a tiled gallery, with a single image of your finished work underneath.
Tone Video & Quiz
Tone experiment (Tonal Value scale)
Use the below template, create a TONAL VALUE SCALE experiment. Choose a different media to use for each line, choose from:
- Black fine liner
- Charcoal
- Graphite
- Pencil
Task – continuous line drawing
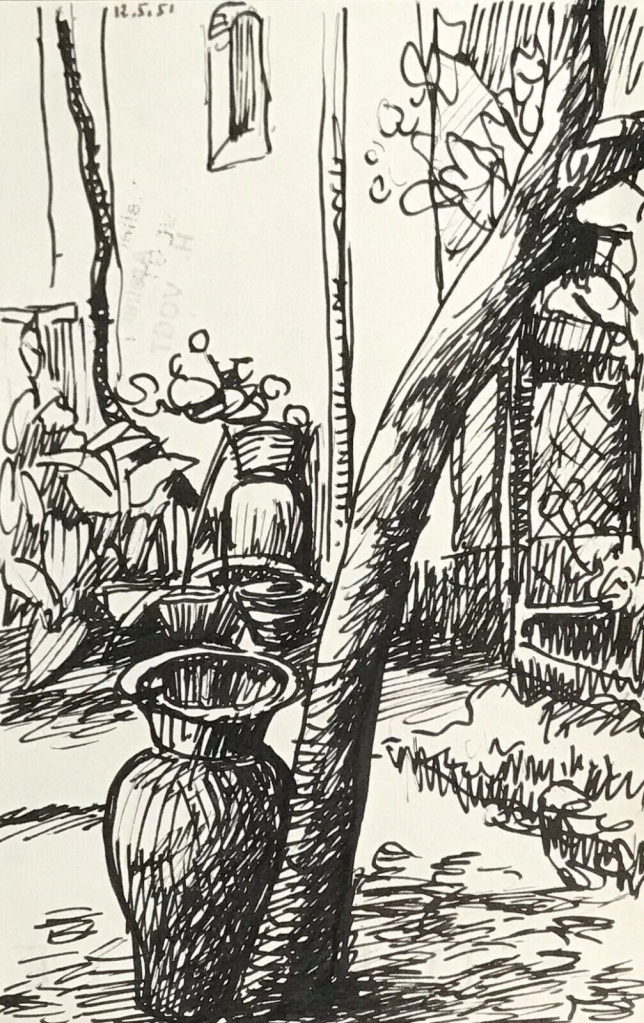
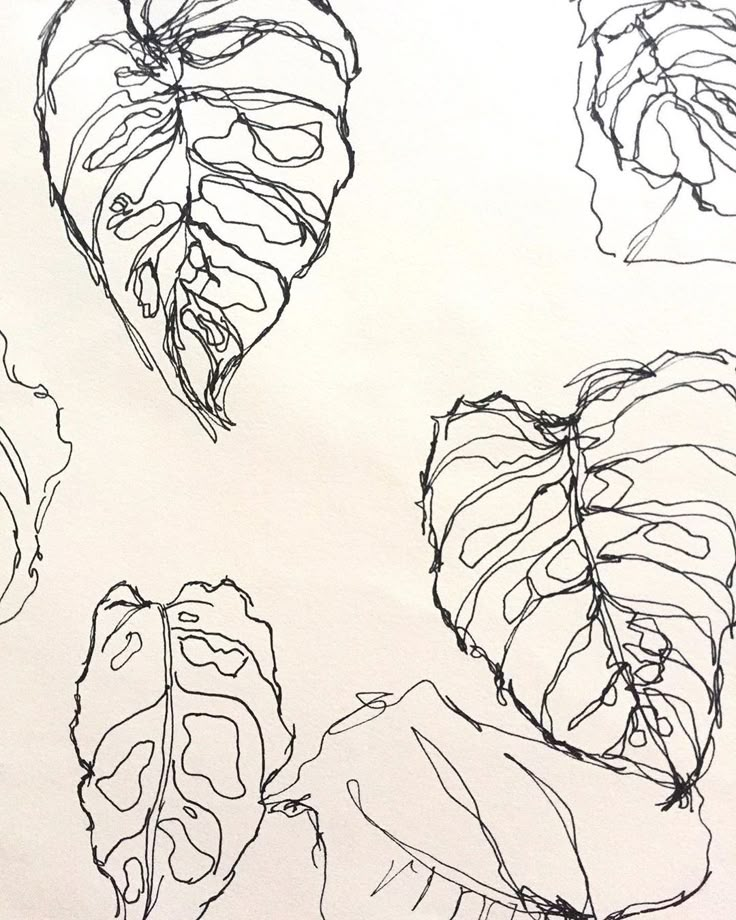
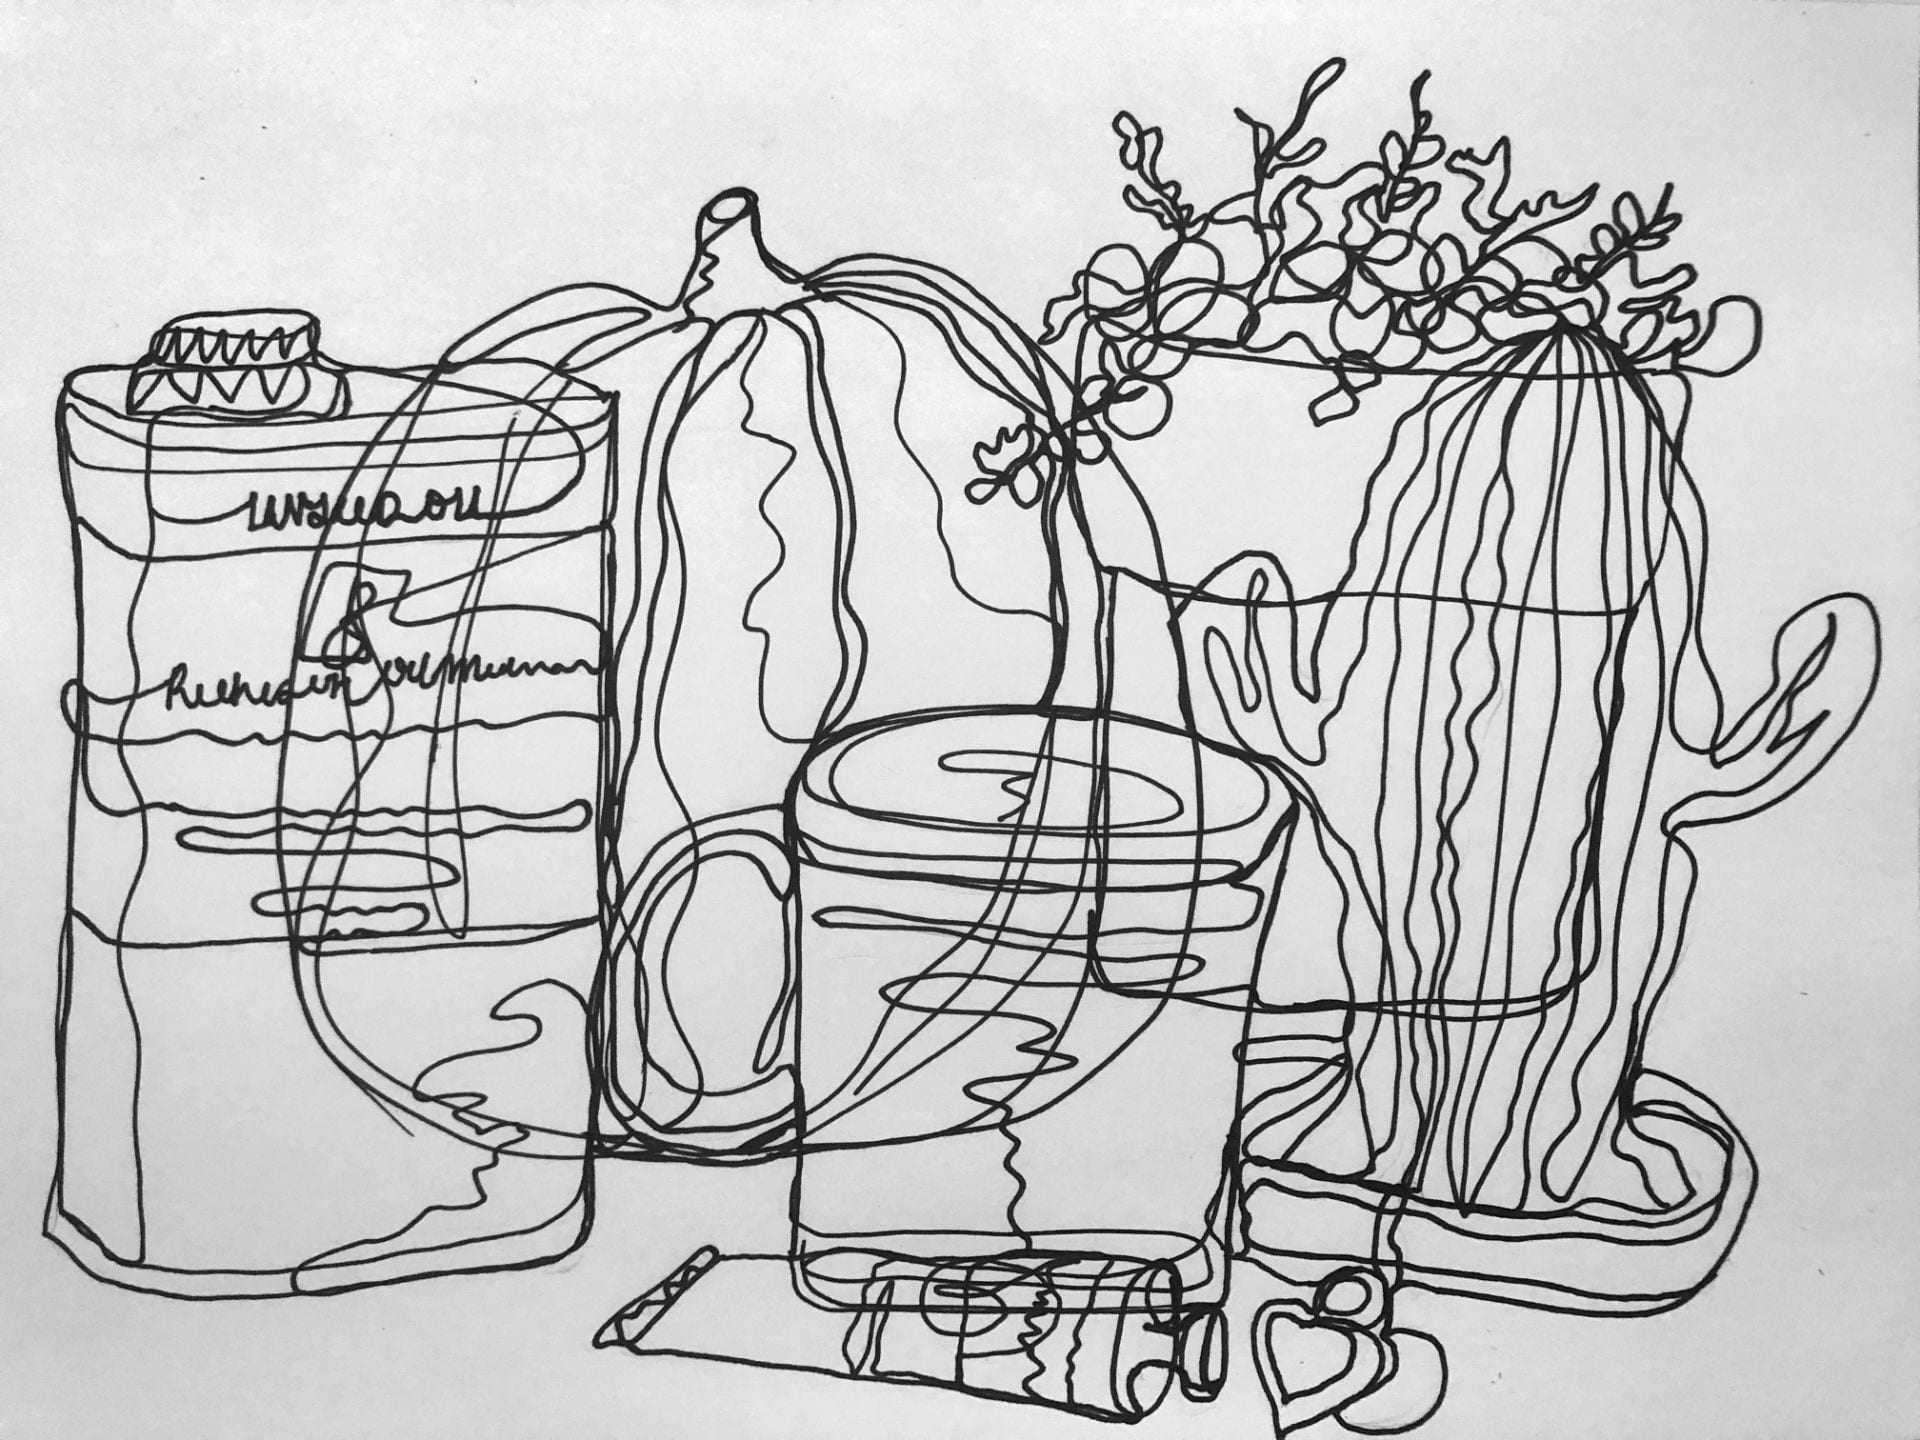
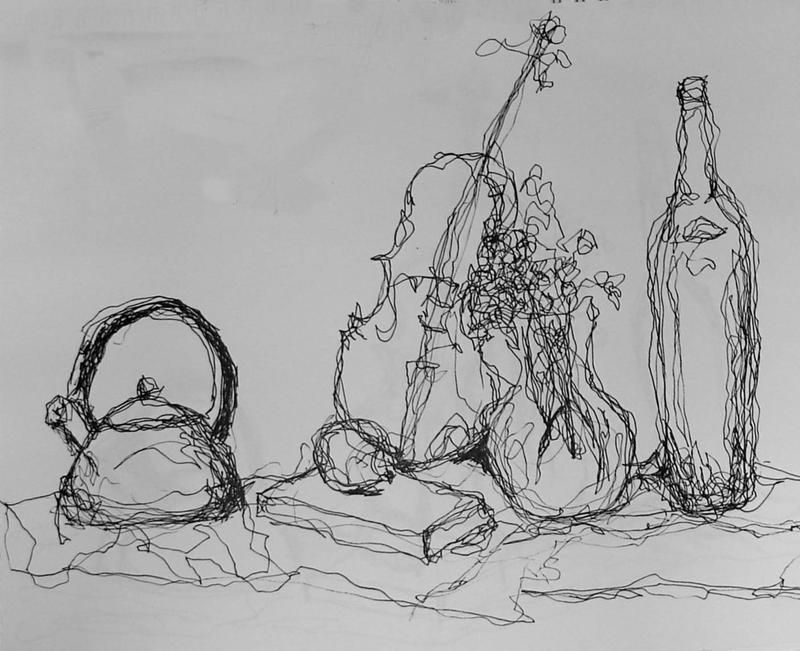
Now working from the still life – collection of objects, experiment with continuous line drawing.
Continuous line drawing is a drawing technique in which the artist creates an image using one unbroken line, never lifting the pencil, pen, or drawing tool from the page. The line flows continuously, moving from one part of the subject to another, which encourages close observation, fluid movement, and expressive mark‑making.
- Using A3 paper and a pencil or fine liner
- Look at the still life in front of you, choose a section to work from.
- Trace the form with your eyes and copy the shape of the object onto your paper.
- Remember don’t life your pen off the paper!
- Create thicker or thinner lines by drawing over the same again – thicker lines bring an object closer to the viewer
In Lesson Tasks – Anita
Acrylic Painting Techniques Videos & Quiz
Practical Task – Pair Painting Inspired by Gustav Klimt
Instructions
- Working in your pairs plan what type of patterns/ symbols/ imagery/ people/animals you will be including in your painting. Look at Klimt’s artwork together. Decide on the colours you will be using too and who will be doing what – will you be working together on all parts? Plan this using pencil and a small piece of paper.
- Start drawing your design onto your A1 cartridge paper – this will be on a much larger scale compared to your plan!
- Then, using acrylic paint, start painting your piece.
- Ensure your piece looks cohesive and that you are working as part of a team.
- Remember to include the visual elements of colour, shape and line and lots of patterns.
- Remember to also take lots of progress photographs of your painting and you working on it from the beginning, the middle and at the end, to upload to your blog.
Painting Tips
- Roll your sleeves up and wear an apron to avoid paint staining your clothes.
- Squeeze only a small amount of paint out of its tube – a little goes a long way!
- Add a little water to your paint for a more translucent & smooth look. You may want to paint a wash first (a background).
- Mix primary paint colours (red, yellow, blue) together to create secondary colours (green, purple, orange).
- Add white to create lighter tones & highlights, and black for darker tones & shades.
- You don’t only need to use a brush to paint with – try other tools such as a sponge, spoon, side of piece of card, or even a stick! Experiment with different types of mark making too.
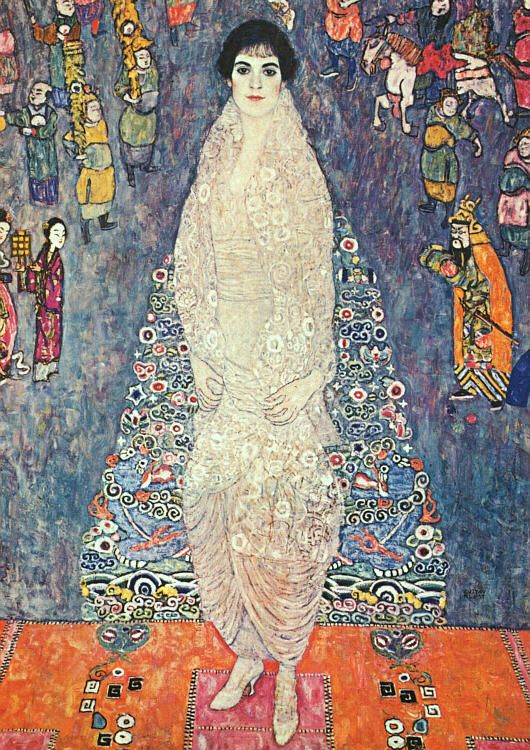
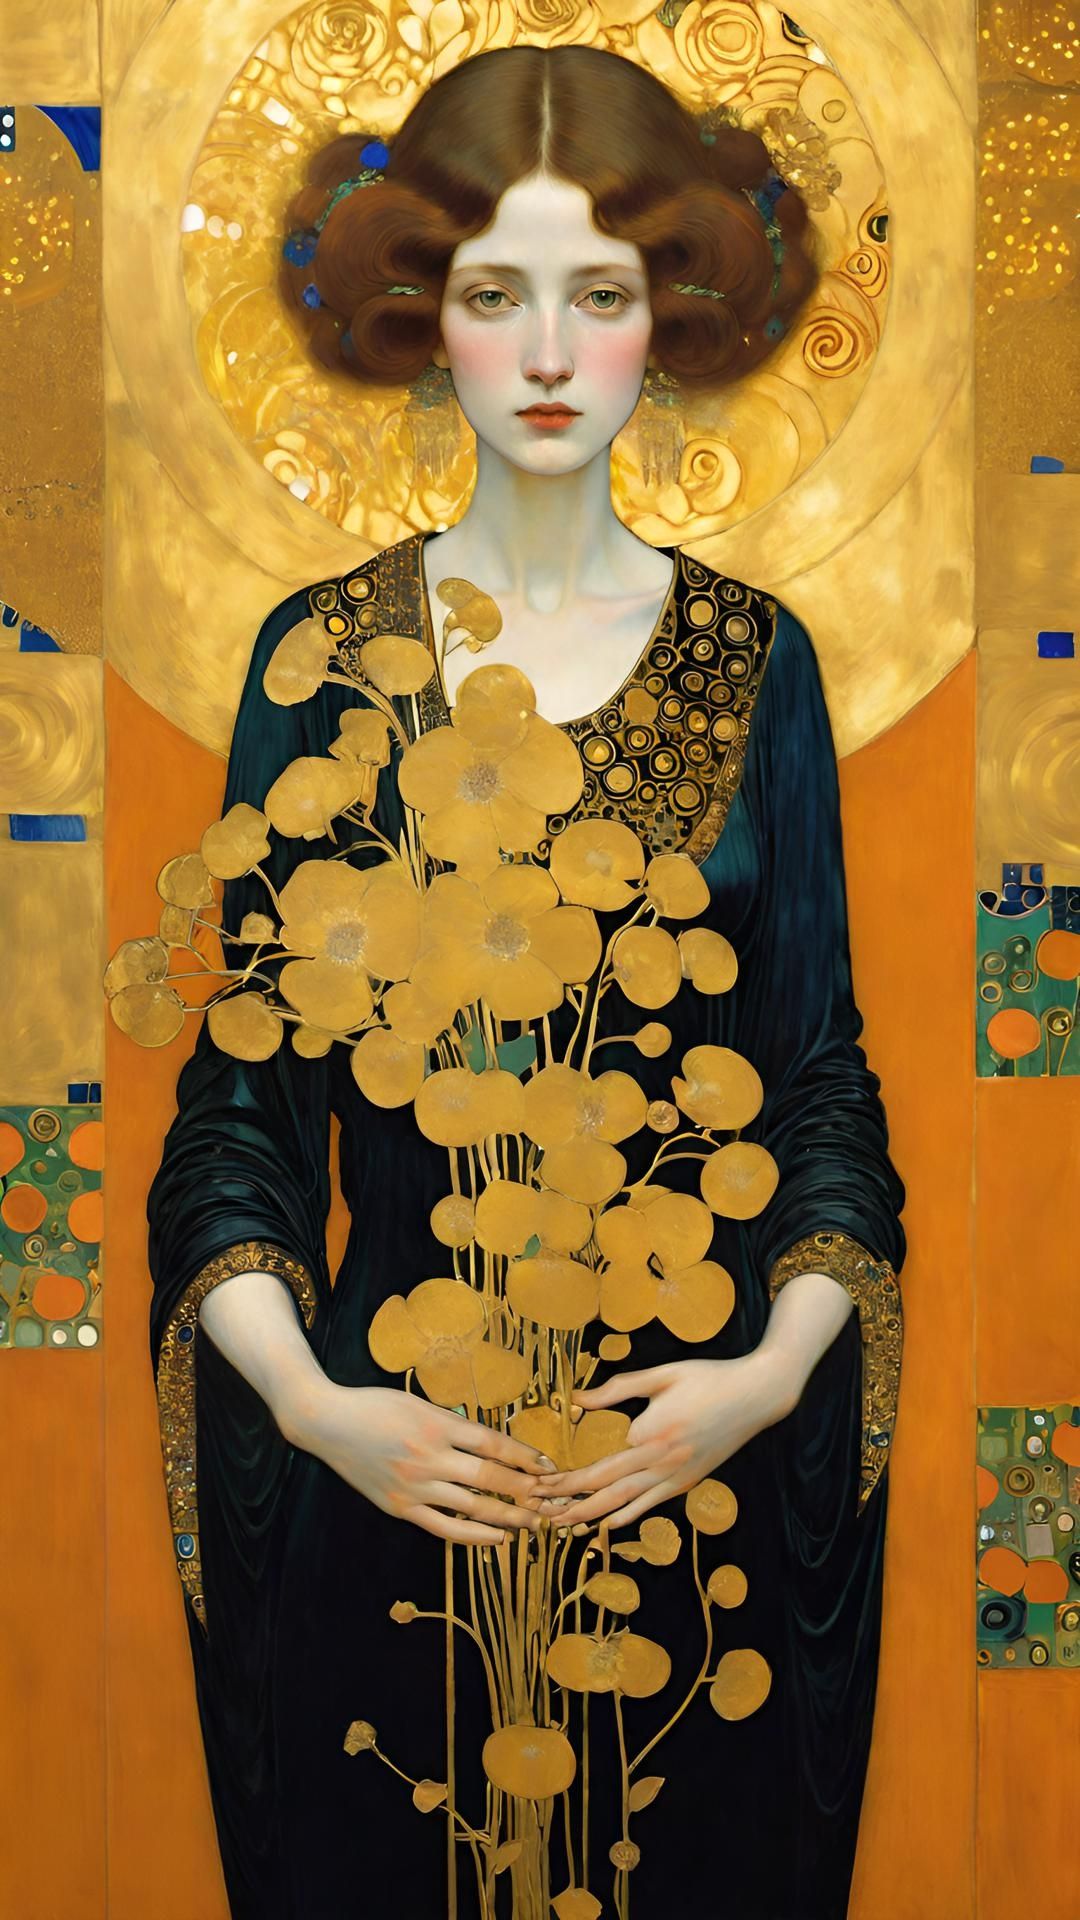
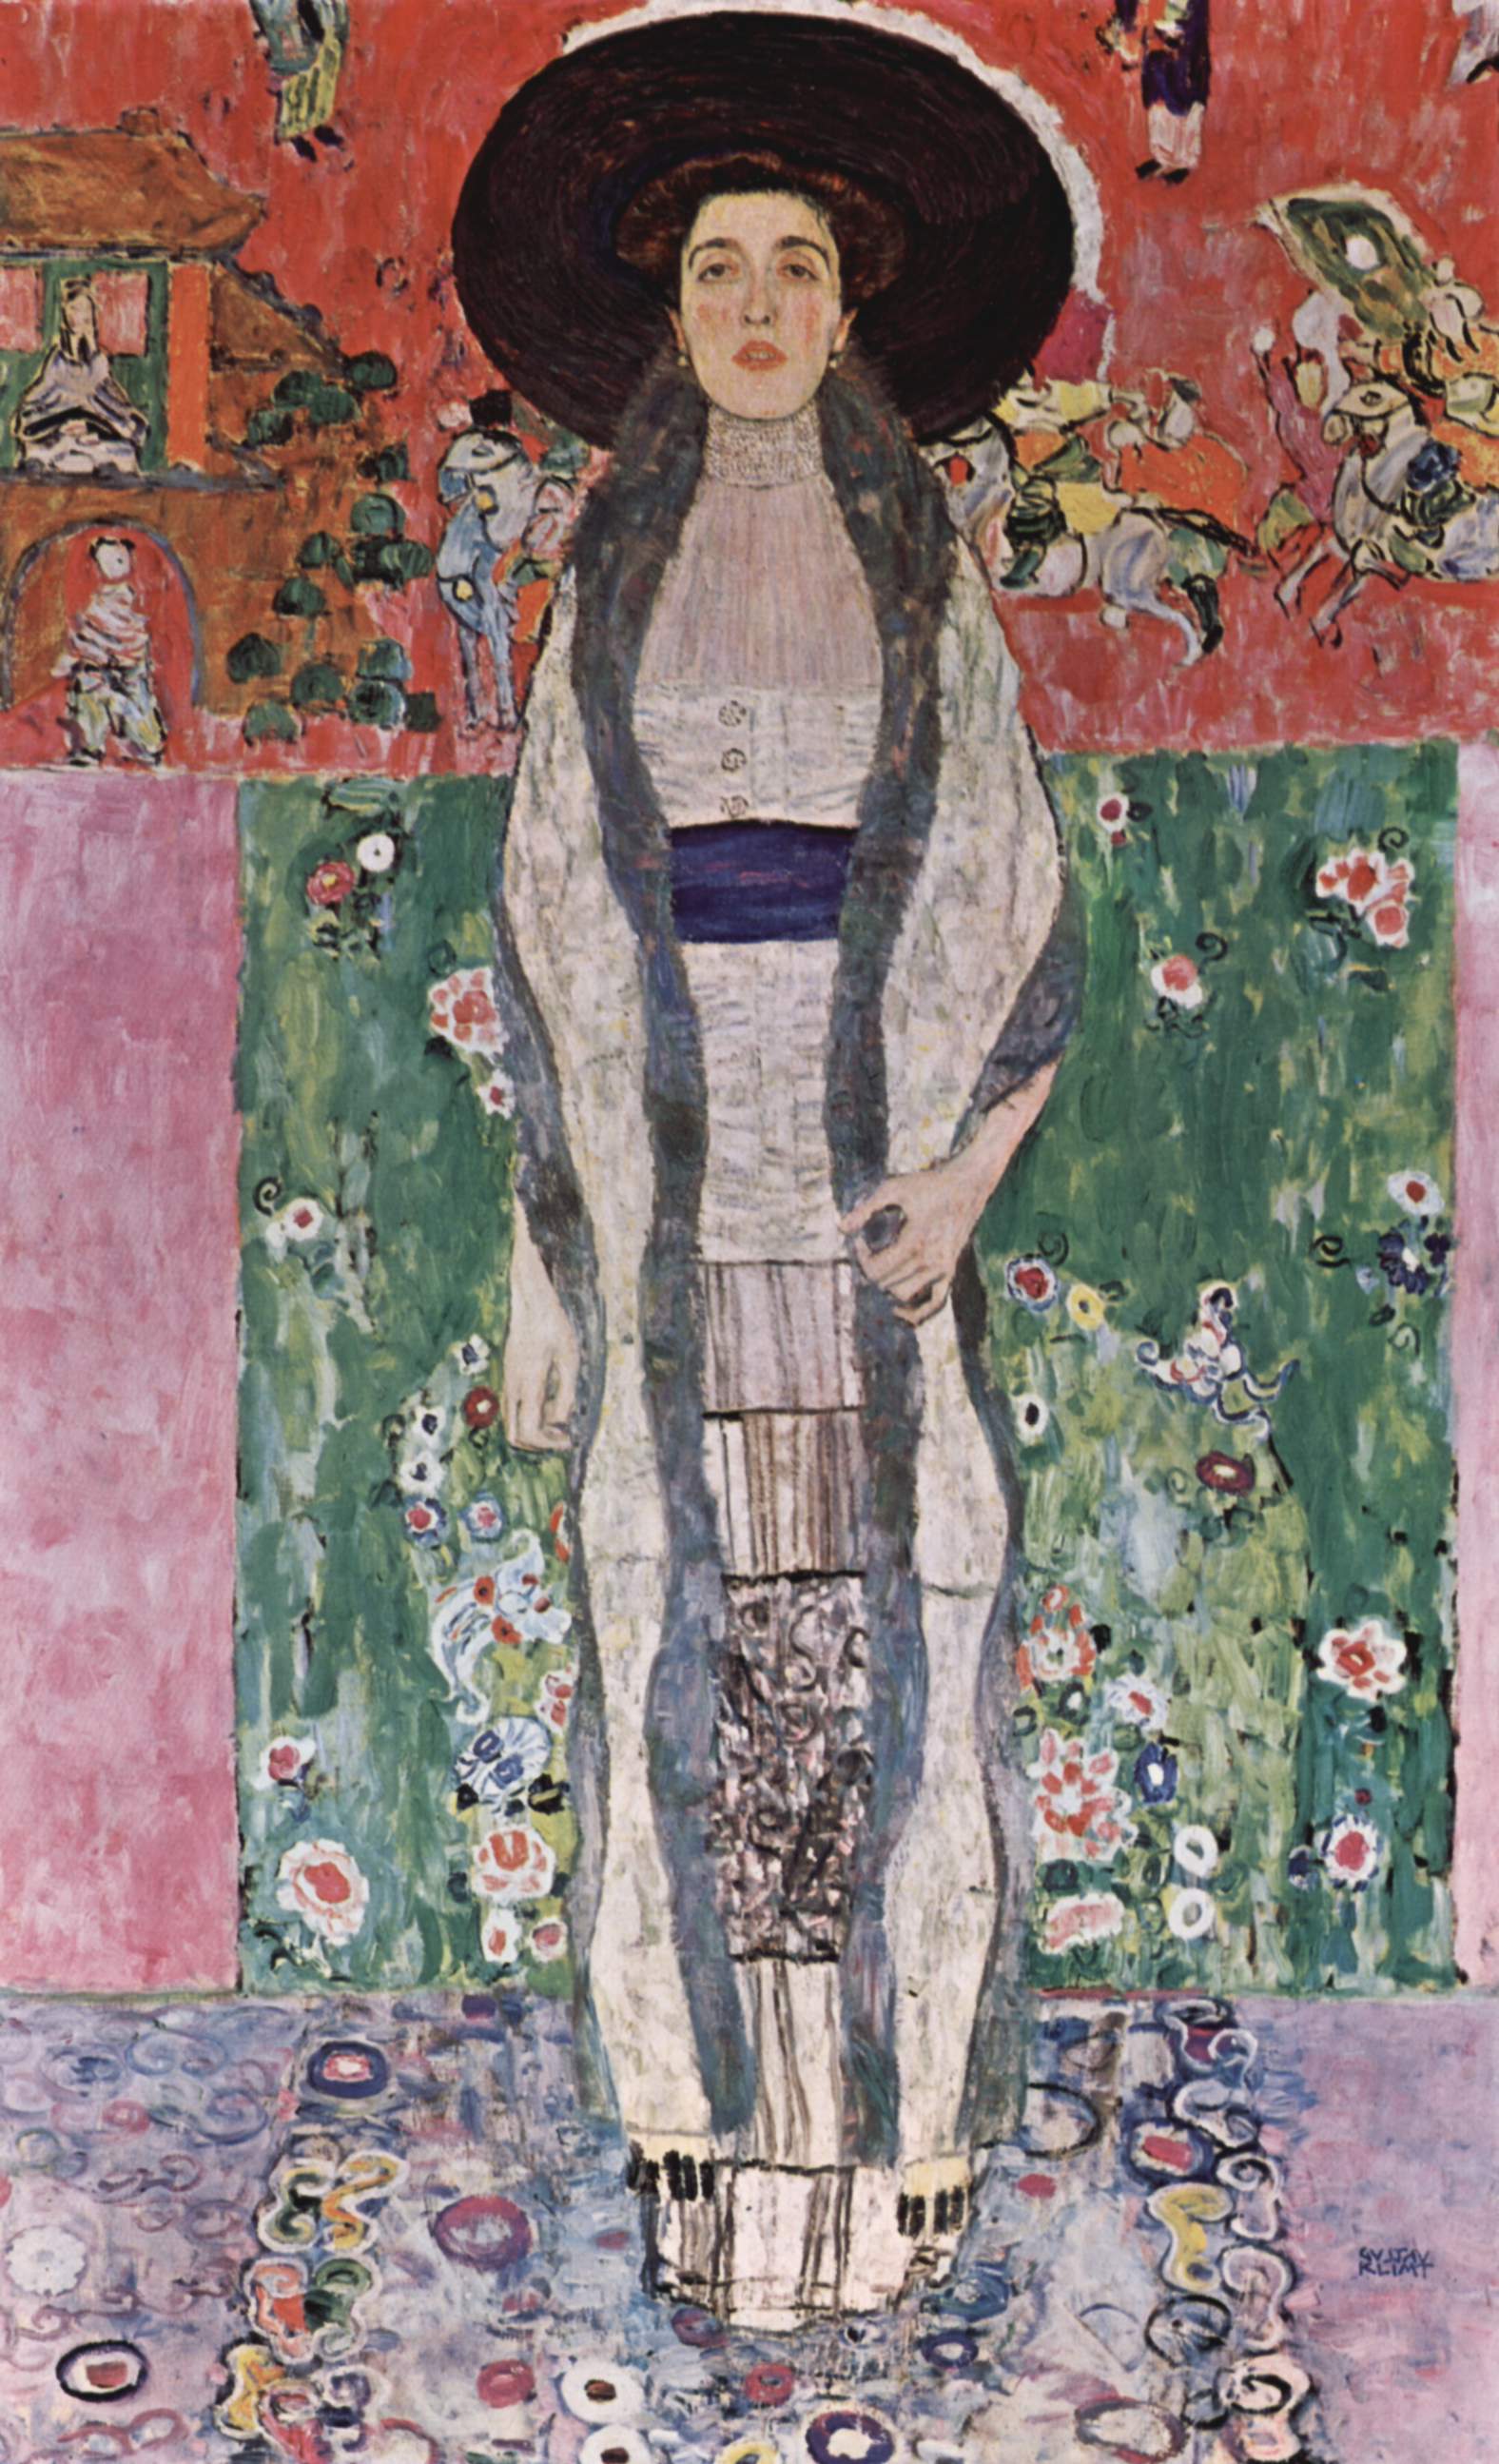
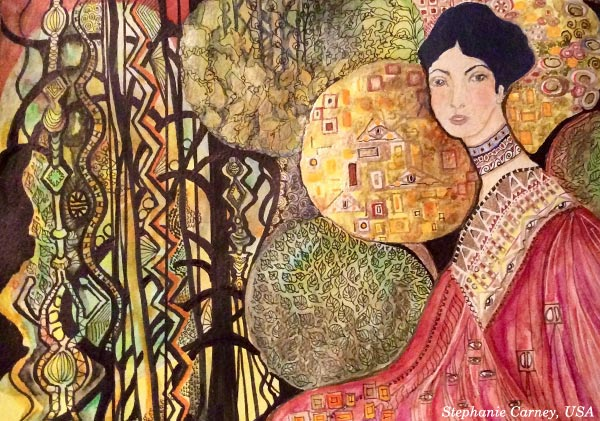
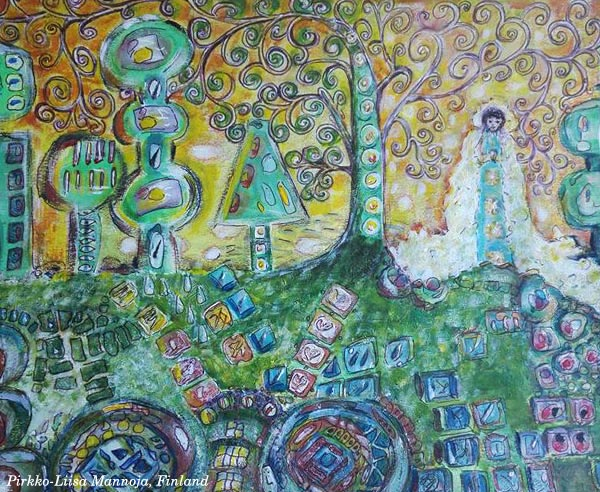
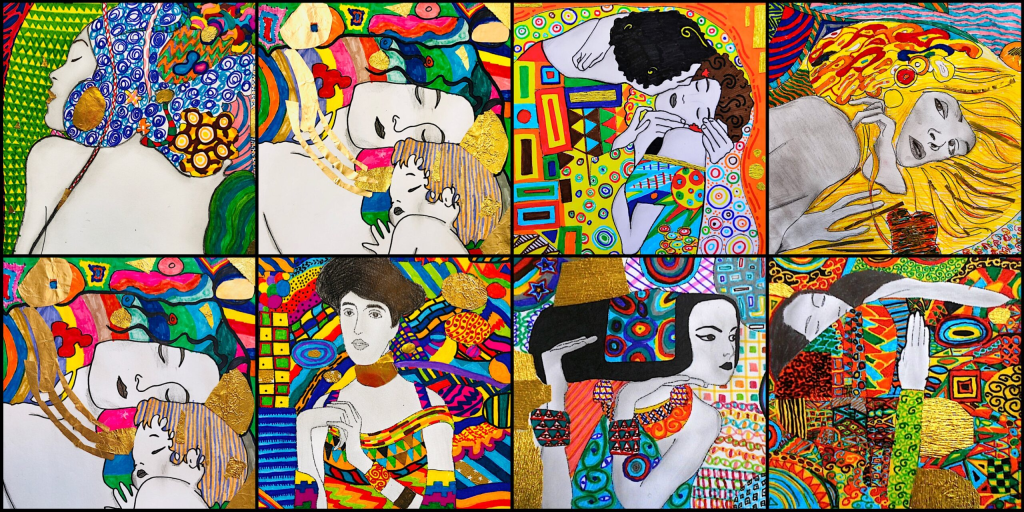
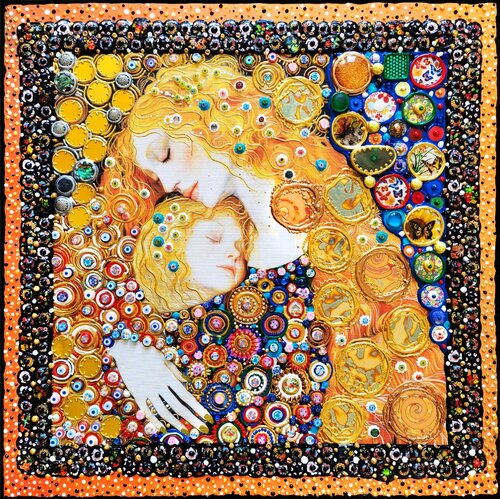
Examples of Student’s Work inspired by Gustav Klimt
Week 2 – w/c 26th Jan
Welcome back to 2D everyone! We hope you are all starting to feel a little more settled into college life and are enjoying your time on the course.
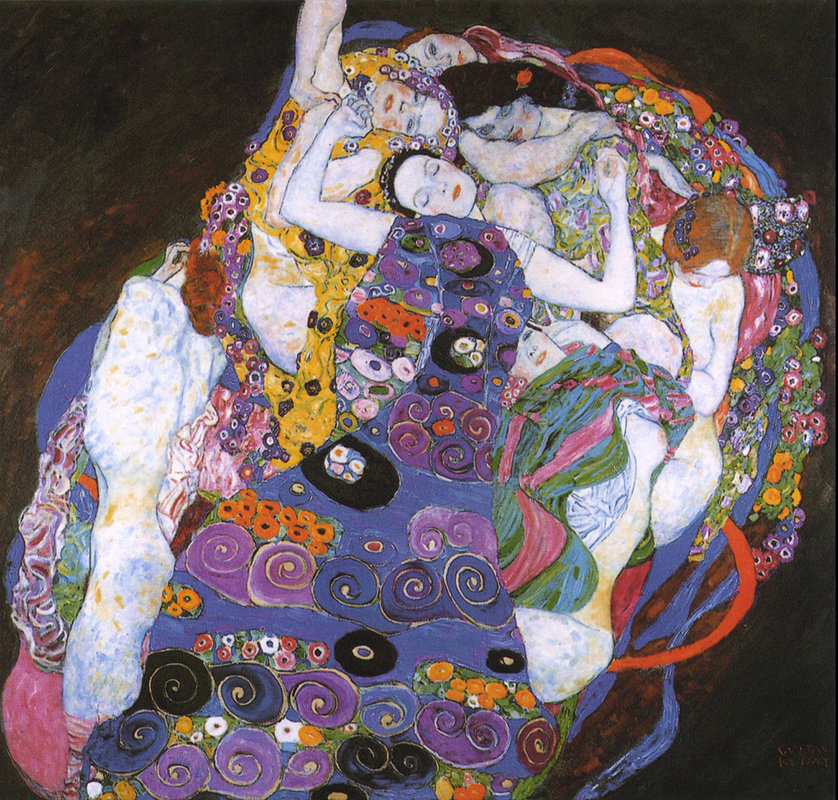
This week with Janna you will start with a short recap quiz on visual elements in which you will test your knowledge and see how much you remember about the visual elements in Art & Design! You will then carry out some further research into our artist from last week, Gustav Klimt. Here you will create your own visual mood board and find out more about his work.
This week with Anita you will start your first practical 2D piece of work of the course. You will be working in pairs to plan and create a painting inspired by Gustav Klimt. For this task you will be working in complete collaboration with your partner to create a cohesive painting inspired by Klimt’s use of patterns, and you will consider the visual elements colour, shape and line in your artwork.
Janna
- Visual elements re-cap quiz
- Gustav Klimt visual mood board research
Anita
- Gustav Klimt re-cap quiz
- Induction Project – start A1 pair practical response painting using visual elements colour, line & shape in the style of Klimt and the patterns he uses
In Lesson Tasks – Janna
Visual Elements Kahoot Re-cap Quiz
https://create.kahoot.it/share/l2-visual-elements-quiz/bab26fcb-4487-4ca9-a844-c1576b1d9961
Klimt Visual Mood Board Task
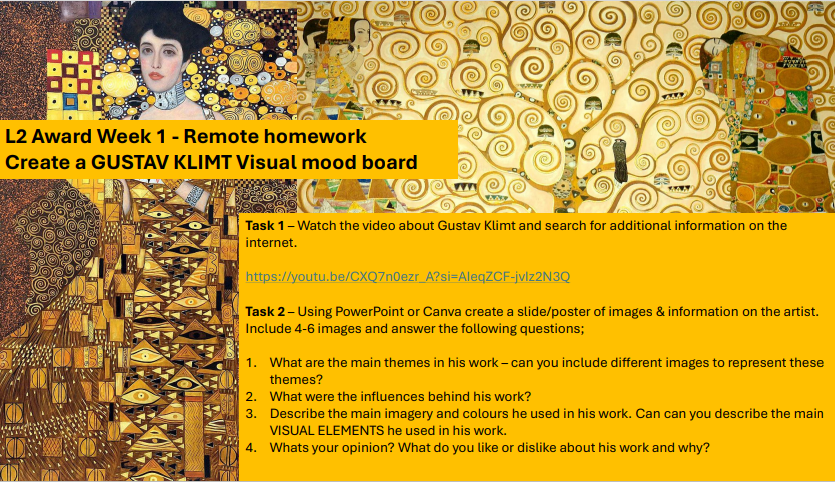
Extension task – Choose your favourite painting by Klimt, draw a section of it – work on A4 paper. Add colour and explore mixed media using pencils, pastels, oil pastels and college materials.
In Lesson Tasks – Anita
Gustav Klimt Kahoot Re-cap Quiz

Practical Task – Visual Elements Pair Painting Inspired by Gustav Klimt
Instructions
- Working in your pairs plan what type of patterns/ symbols/ imagery/ people/animals you will be including in your painting. Look at Klimt’s artwork together. Decide on the colours you will be using too and who will be doing what – will you be working together on all parts? Plan this using pencil and a small piece of paper.
- Start drawing your design onto your A1 cartridge paper – this will be on a much larger scale compared to your plan!
- Then, using acrylic paint, start painting your piece.
- Ensure your piece looks cohesive and that you are working as part of a team.
- Remember to include the visual elements of colour, shape and line and lots of patterns.
- Remember to also take lots of progress photographs of your painting and you working on it from the beginning, the middle and at the end, to upload to your blog.
Painting Tips
- Roll your sleeves up and wear an apron to avoid paint staining your clothes.
- Squeeze only a small amount of paint out of its tube – a little goes a long way!
- Add a little water to your paint for a more translucent & smooth look. You may want to paint a wash first (a background).
- Mix primary paint colours (red, yellow, blue) together to create secondary colours (green, purple, orange).
- Add white to create lighter tones & highlights, and black for darker tones & shades.
- You don’t only need to use a brush to paint with – try other tools such as a sponge, spoon, side of piece of card, or even a stick! Experiment with different types of mark making too.
Examples of Student’s Work inspired by Gustav Klimt
Week 1 – w/c 19th Jan

Hi everyone and welcome to 2D (which stands for two dimensional) as part of your 10 week Art course at West Thames College!
We are going start with your course induction presentation, which will give you lots of information about the college, your course and the structure of your 10 week course. We will then do some ice breakers so we can all start to get to know each other. You might be feeling a little nervous, but please don’t worry you will soon feel settled at college. Your teachers are here to help if you need anything!
You will be based in studio B535 for all your 2D sessions on a Friday afternoon. Take a look around for all the exciting work you will be doing in here from painting & drawing to printing, to mixed media & collage!
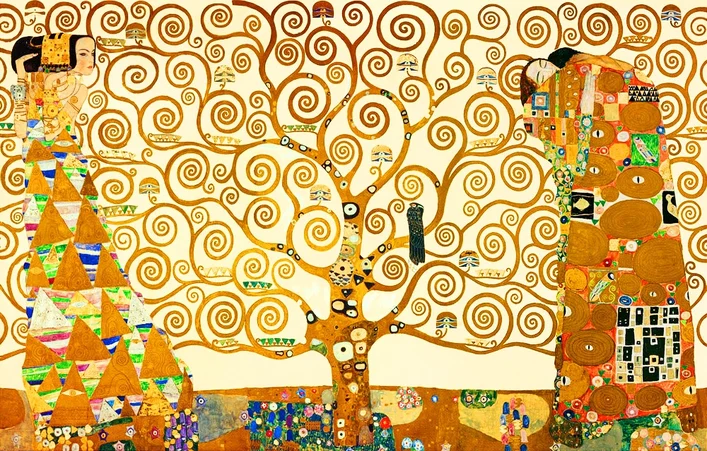
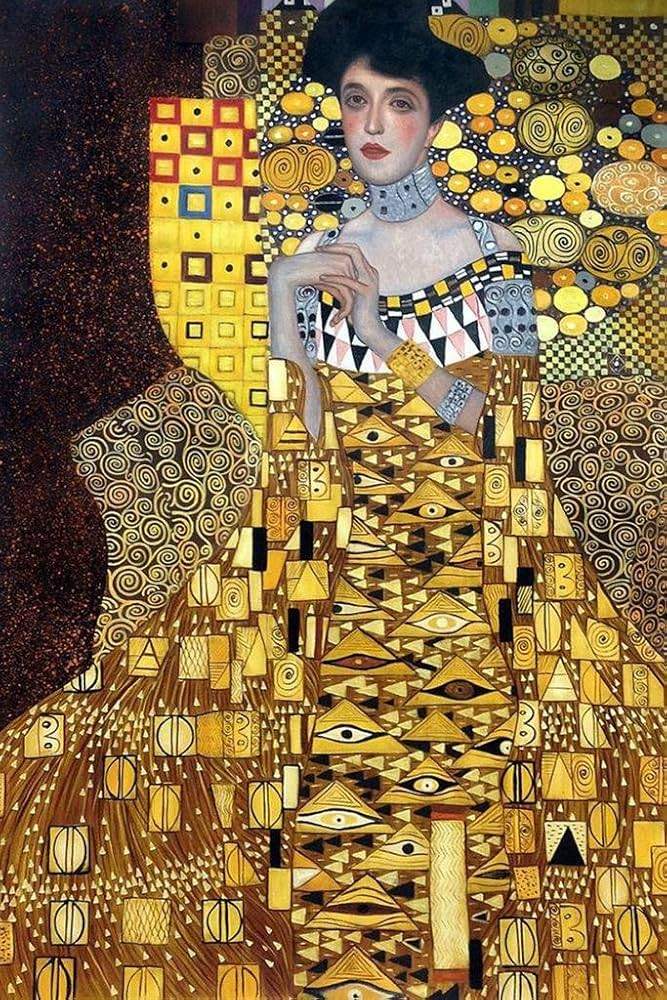
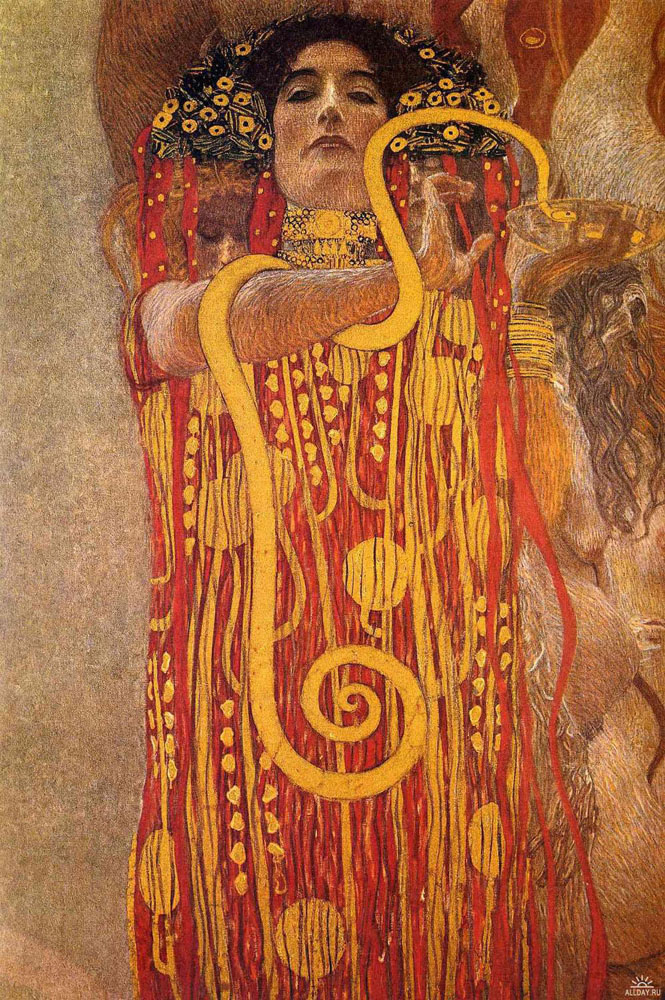
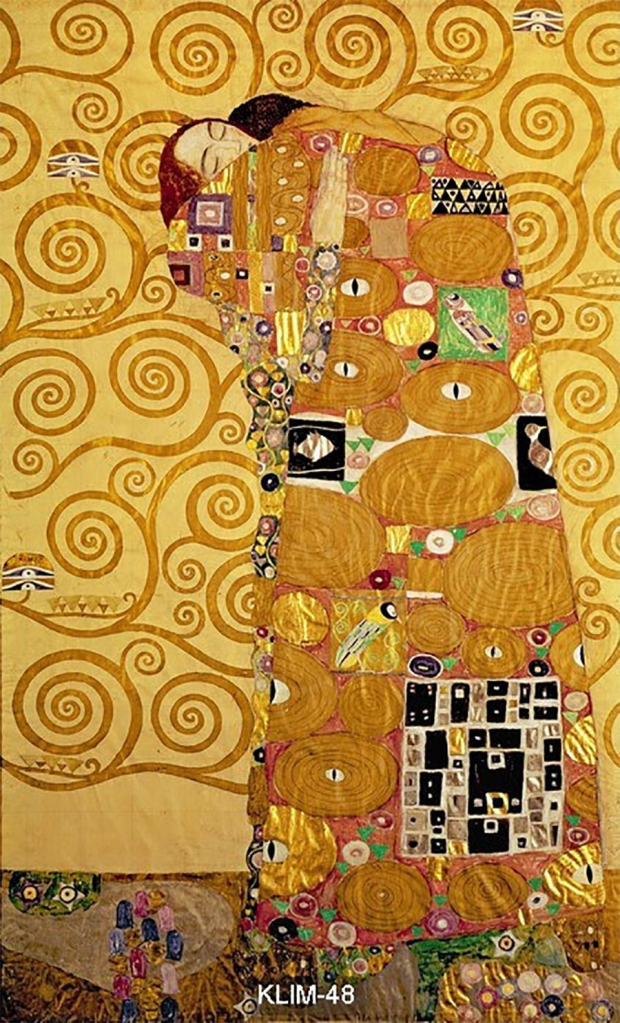
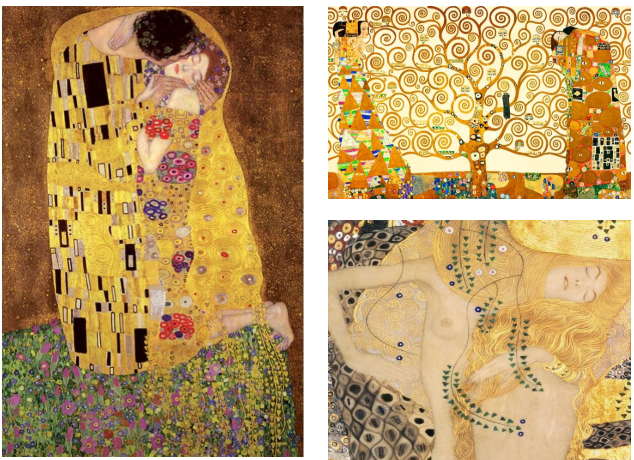
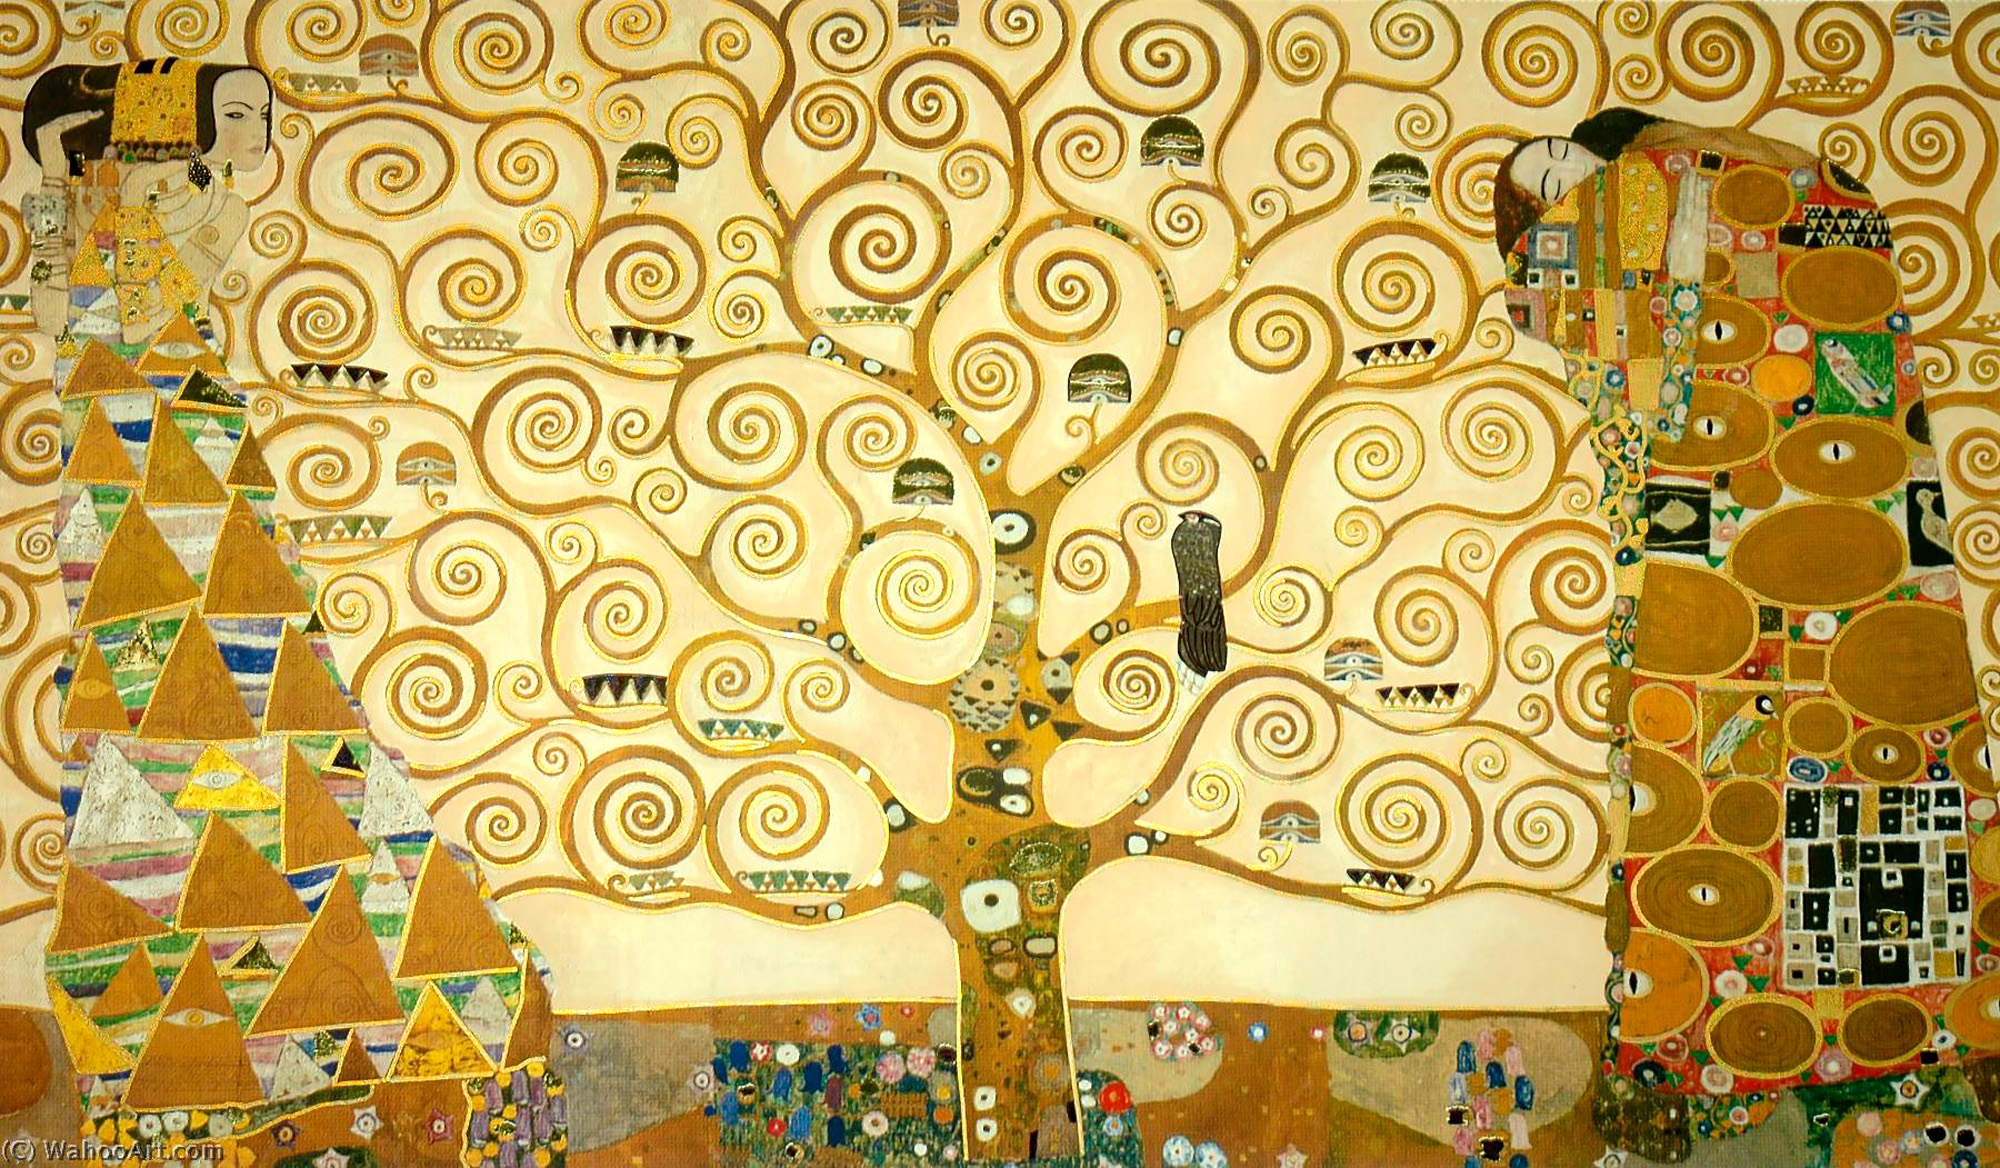
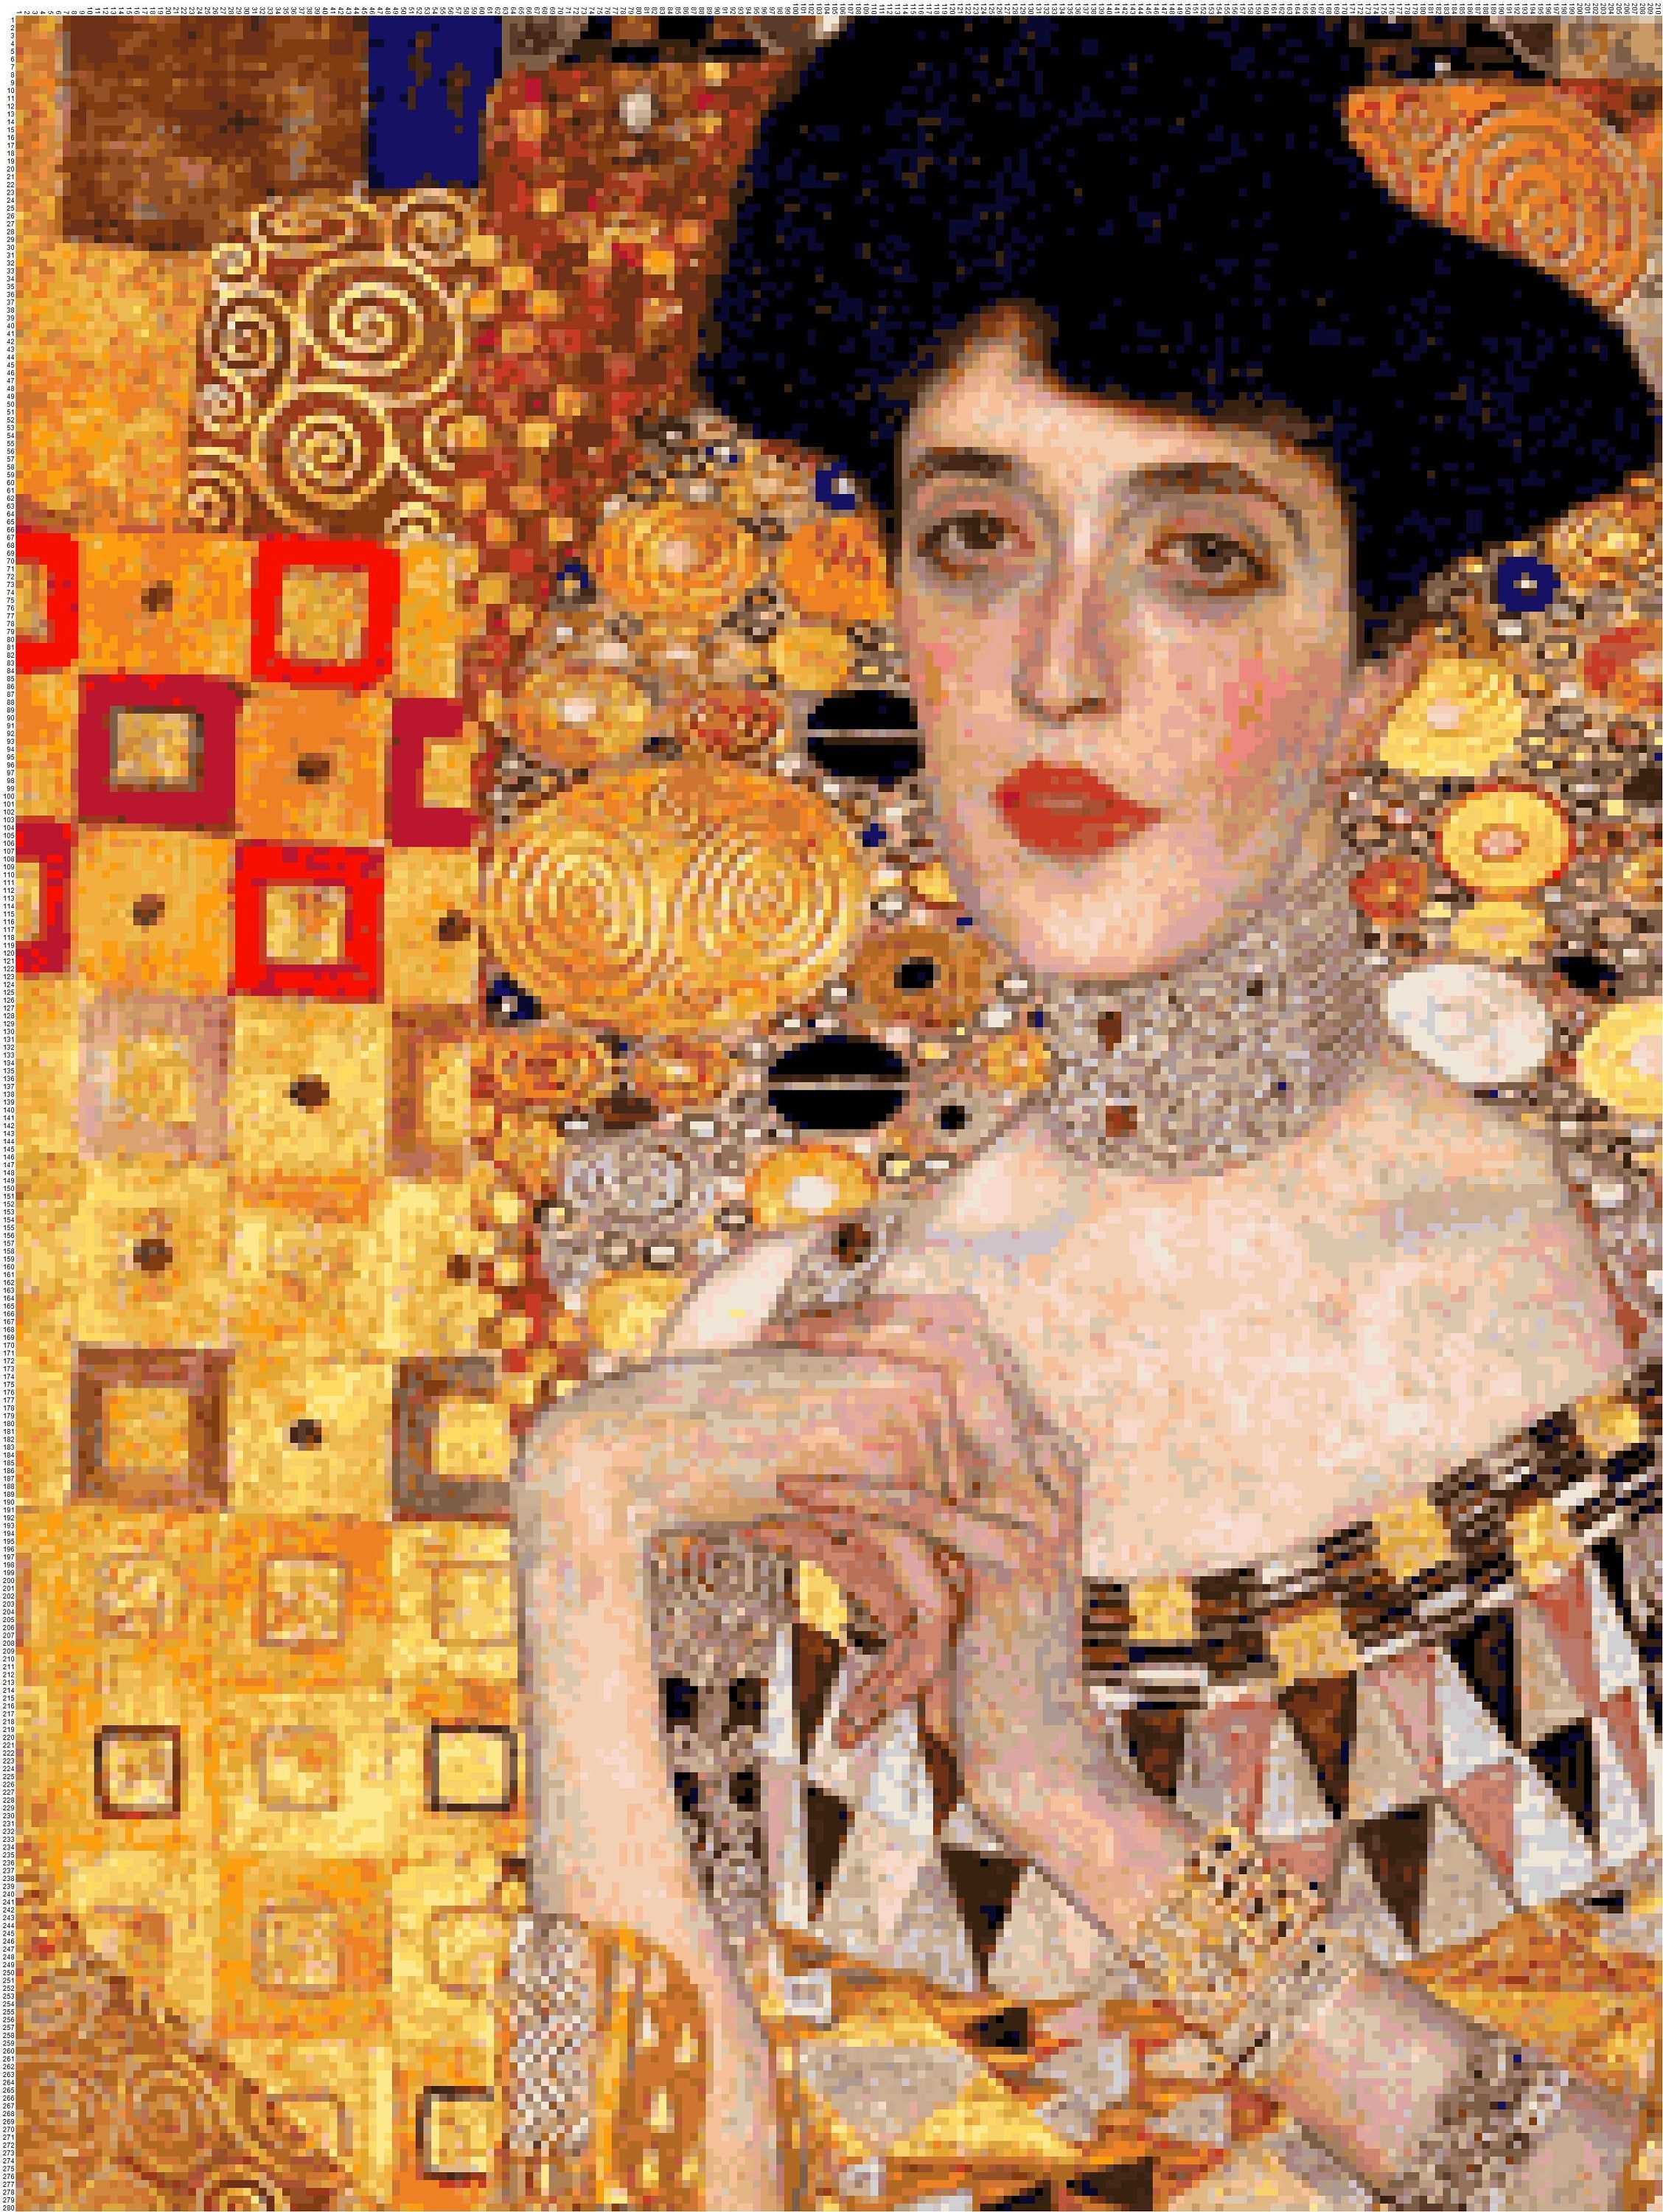
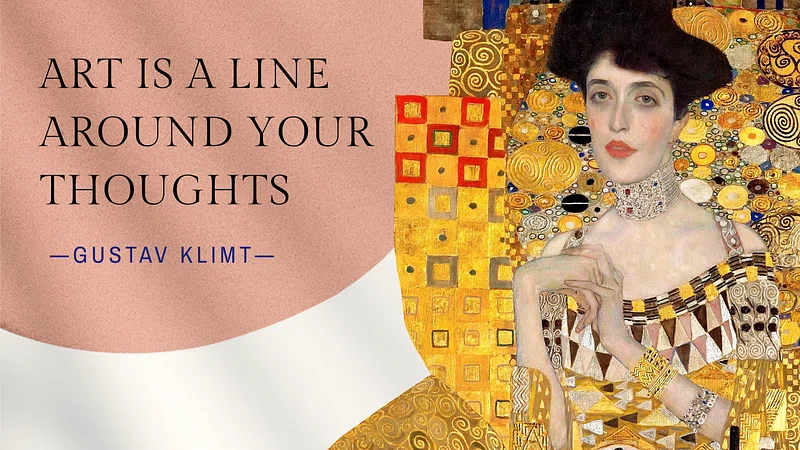
In your first week you will take part in a quiz, testing how much you already know about Art & Design! You will also look at the elements of Art & Design and explore why they are so important in the world of Art & Design. You will then start your first 2D project of the course (Induction project) where you will look closely at painter Gustav Klimt and study how he used patterns & shapes in his artwork. You will then start your first practical piece of artwork where you will be working in pairs to create a painting inspired by Gustav Klimt using the visual elements patterns, colour, shape & line!
- Warm Up – 2D art materials word search
- Visual elements video
- Visual elements quiz
- Kahoot Quiz – how much do you know about art & design?
- Icebreaker – get to know each other!
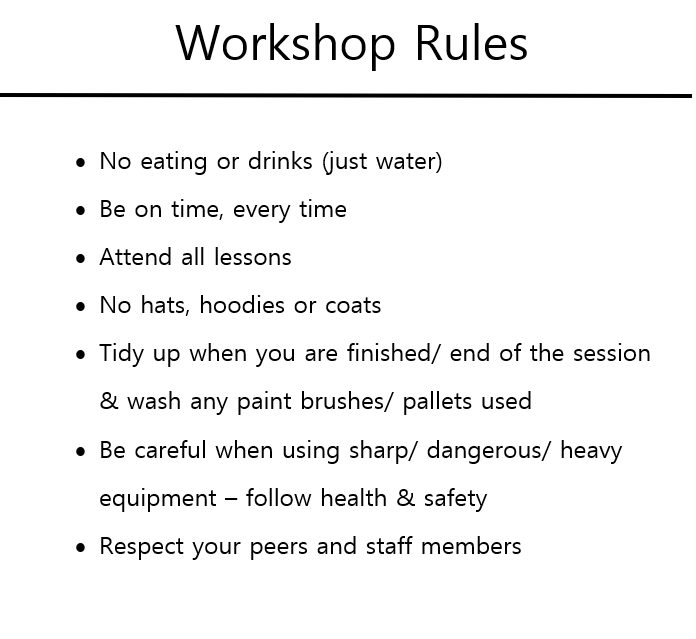
- Workshop Rules
- Induction Project – Artist video & quiz – Gustav Klimt
- Induction Project – Artist pair discussion worksheet – Gustav Klimt
- Induction Project – start A1 pair practical response painting using visual elements colour, line & shape in the style of Klimt and the patterns he uses
- Gustav Klimt Visual Mood Board
In Lesson Tasks
Induction Presentation
2D Materials Word Search
The Visual Elements & Quiz
Kahoot Quiz – How much do you already know about Art?

Workshop Rules
Icebreaker – ask your partner…
1. What is your name?
2.What is your dream job?
3.What is your favourite colour & why?
4.Who is your favourite artist (can be a musician, actor, painter etc…)? Why do you like them?
5. Name an interesting fact about you (such as a hidden talent, a special skill, met anyone famous, speak a different language)?
Induction Project…
Artist Reference – Gustav Klimt
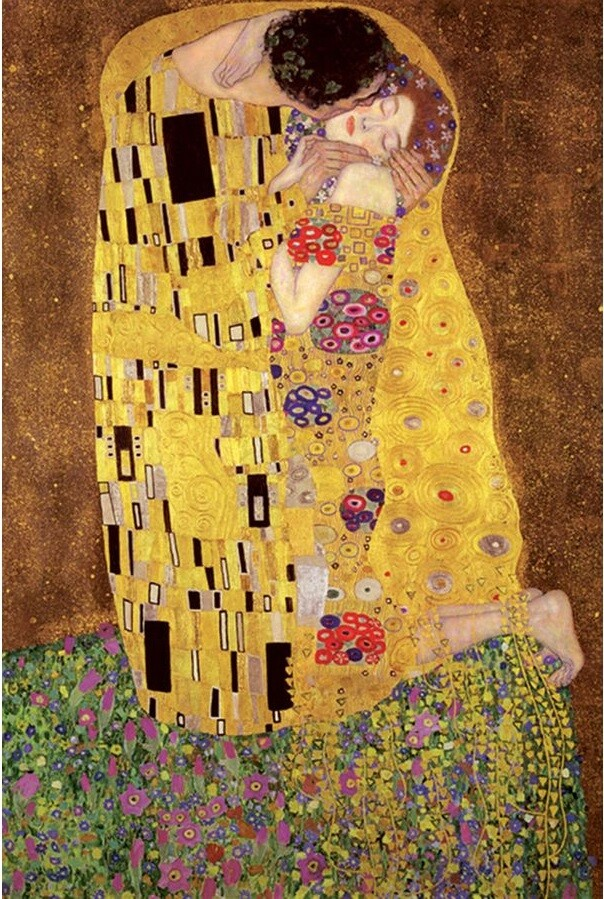

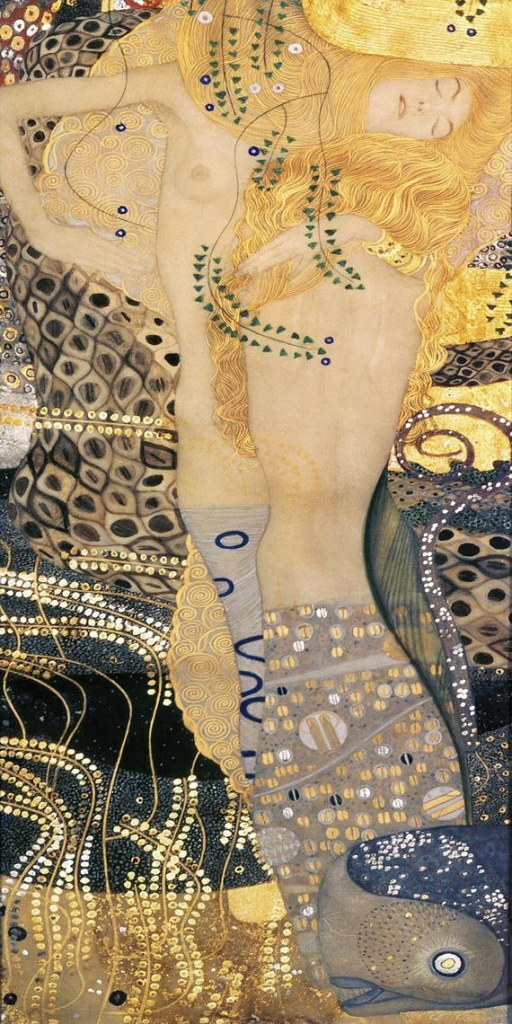
Artist Video & Quiz – Gustav Klimt
Artist Pair Discussion – Gustav Klimt
Practical Task – Visual Elements Pair Painting Inspired by Gustav Klimt (exploring patterns, colour, shape & line)
- Working in your pairs plan what type of patterns/ symbols/ imagery/ people/animals you will be including in your painting. Look at Klimt’s artwork together. Decide on the colours you will be using too and who will be doing what – will you be working together on all parts? Plan this using pencil and a small piece of paper.
- Start drawing your design onto your A1 paper.
- Then using acrylic paint, start painting your piece.
- Ensure your piece looks cohesive and that you are working as part of a team.
- Remember to include the visual elements of colour, shape and line and lots of patterns.
- Remember to also take lots of progress photographs of your painting and you working on it from the beginning, the middle and at the end, to upload to your blog.
Examples of Student’s Work inspired by Gustav Klimt
