INDUCTION PROJECT – ORDER AND CHAOS
Important Dates & Resources
Project Brief
| Project Launch | w/c 31st Aug 2026 |
| Formative Feedback | w/c 21st Sep 2026 |
| Target Completion | — |
| Summative Feedback | w/c 28st Sep 2026 |
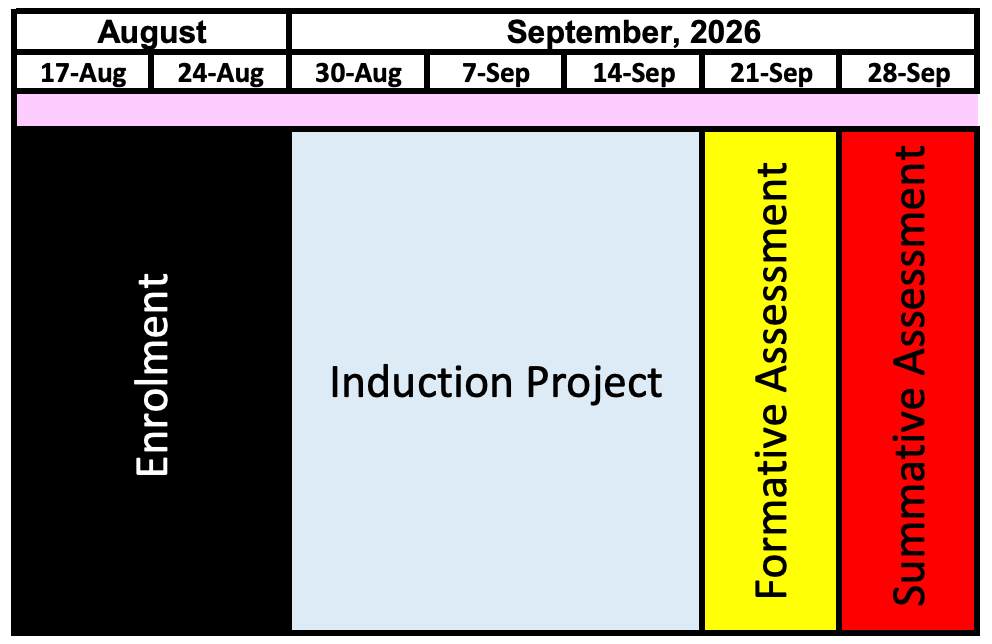
WEEK 2 – WC/ 7th Sep
This week we will learn the basics of Blender by creating a simple artwork inspired by Piet Mondrian. We will practise adding cubes, scaling them on different axes, moving them, changing their colours, and duplicating them to form a grid-like design. This will introduce us to Blender’s essential tools while linking to our project theme, “Patterns and Repetition.”

In Lesson Tasks
🎨 Piet Mondrian – Blender Response
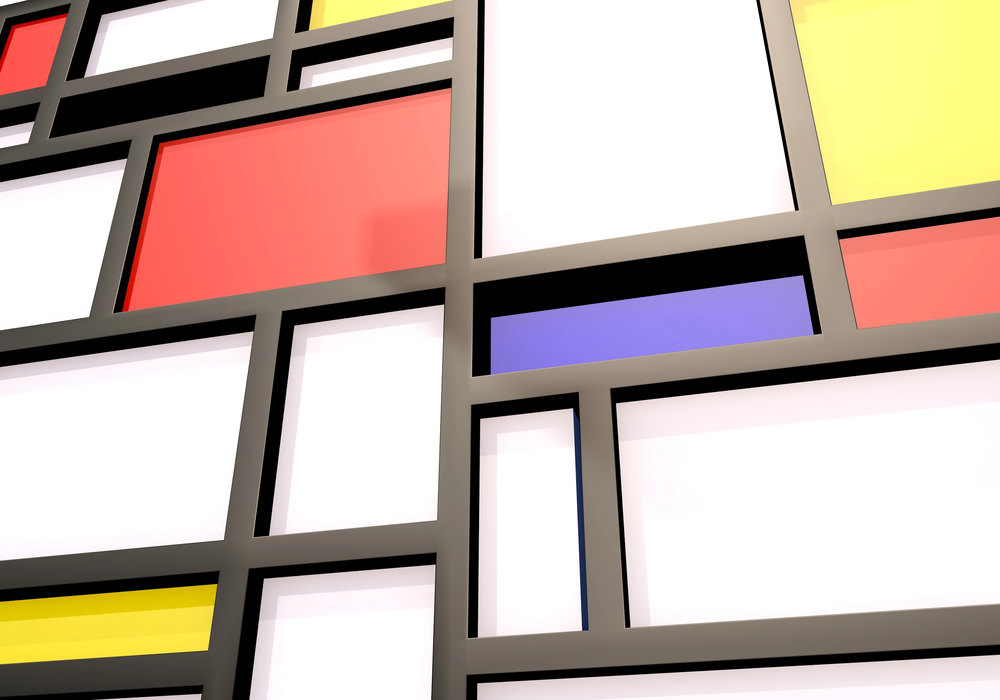
Piet Mondrian was an artist who used straight lines, rectangles and primary colours such as red, blue and yellow, together with black and white.
His paintings often look like grids made from different-sized rectangles.
In this task, you will use cubes in Blender to create your own 3D composition inspired by Mondrian.
Step 1: Add a Cube
- Press Shift + A
- Choose Mesh → Cube
👉 A new cube will appear in your scene.
Step 2: Change the Size
Use Scale to turn your cube into a rectangle.
- S → make the whole object bigger or smaller
- S + X → make it wider or narrower
- S + Y → make it deeper or thinner
- S + Z → make it taller or shorter
👉 Create rectangles in different sizes.
Step 3: Move the Shape
Use G to move your rectangle.
- G + X → move left/right
- G + Y → move forwards/backwards
- G + Z → move up/down
Arrange your shapes so they begin to create a Mondrian-style grid.
Step 4: Change Only One Side
Sometimes scaling changes both sides of your rectangle.
If you only want to change one side:
- Select the rectangle.
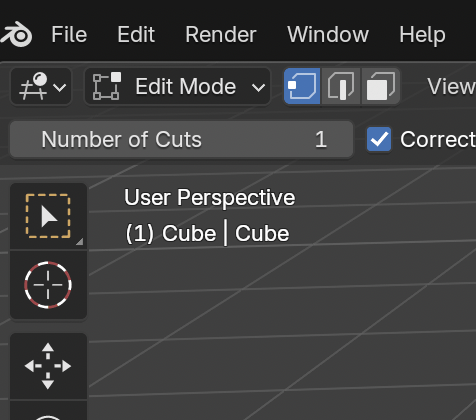
- Change from Object Mode to Edit Mode.
- Press Tab, or
- Click the mode menu at the top-left and choose Edit Mode.
- Choose Face Select by clicking the square face icon at the top.
- You can also press 3 on the keyboard.
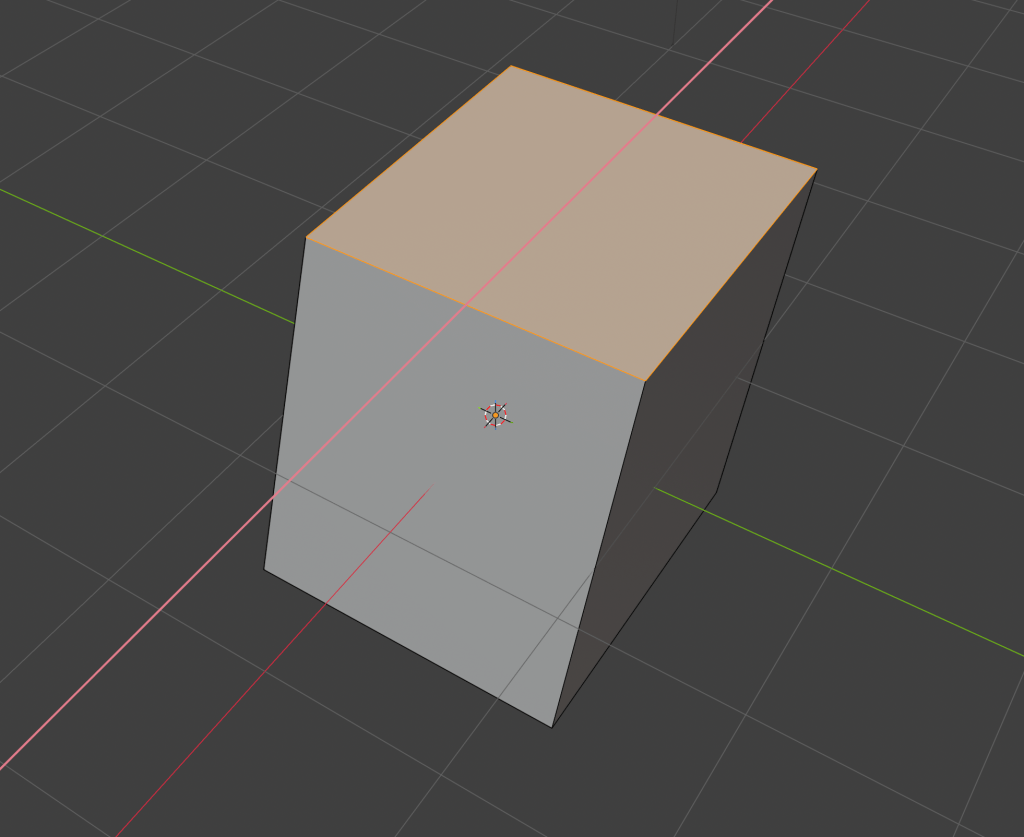
- Click the side of the rectangle you want to move.
- Press:
- G + X → move the side left/right
- G + Y → move it forwards/backwards
- G + Z → move it up/down
- Click to confirm.
- Go back to Object Mode using Tab or the same mode menu.
👉 This lets you make one side longer or shorter without changing the whole rectangle.
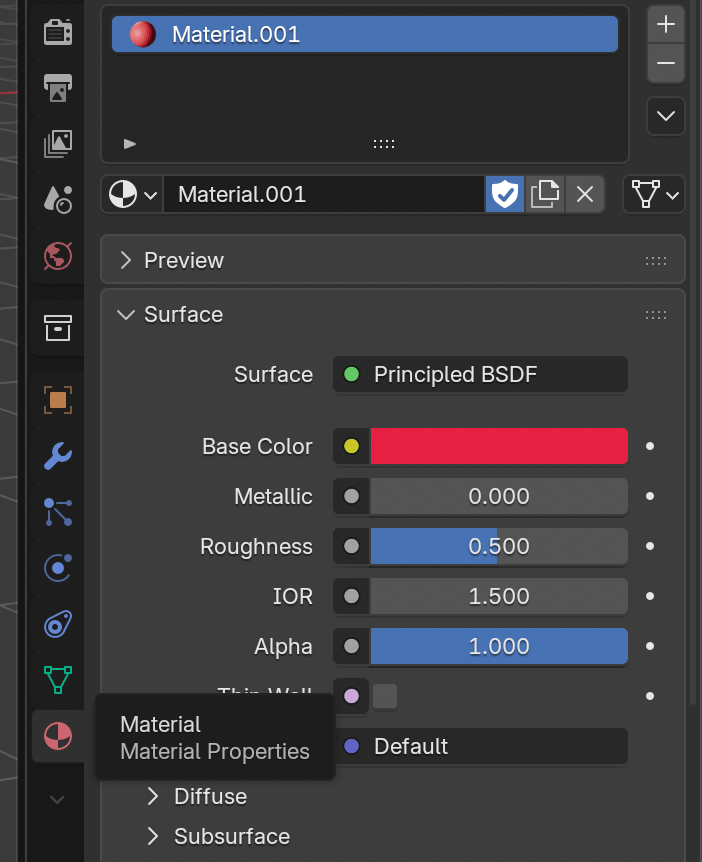
Step 5: Add Colour
- Step 5: Add Colour
- Select your object.
- Open Material Properties – the red sphere icon.
- Click New.
- Find Base Color.
- Choose a Mondrian-inspired colour:
- 🔴 Red
- 🔵 Blue
- 🟡 Yellow
- ⚫ Black
- ⚪ White
- Press Z → Material Preview to see the colours.
👉 Use Mondrian’s colours to make your composition.
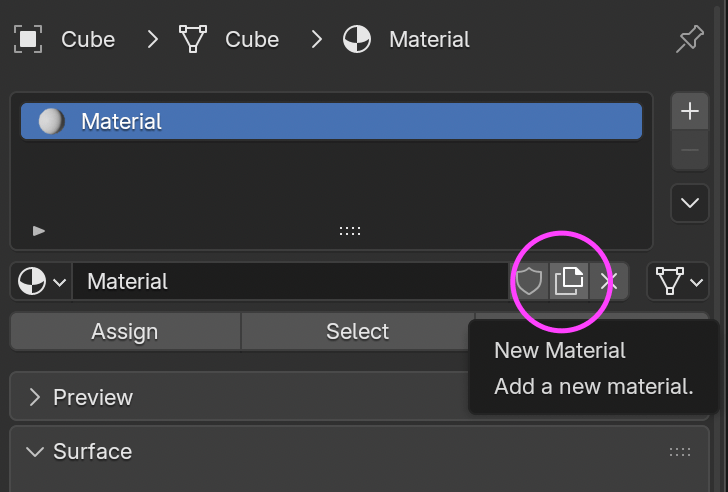
Step 6: Create a New Material
If you want a different colour, you need to create a new material.
- Select the object.
- Go to Material Properties (the material tab on the right).
- Click the New Material icon — the small icon shown in the screenshot.
- A new material will be created.
- Change the Base Colour to the colour you want.
- If needed, click Assign to apply it to the selected part.
👉 Use this when you want to make a new colour instead of using the same material again.
Step 7: Duplicate Cubes (to repeat the pattern)
- Press Shift + D to duplicate the cube.
- Move the new cube into place (G + axis).
- Change its size (S + axis) and colour.
👉 Repeat this step to build a Mondrian-style grid with many coloured rectangles.
tep 8: Build Your Final Composition
Your final design should include:
- Different-sized rectangles
- Straight horizontal and vertical lines
- Black sections or borders
- Red, blue and yellow
- White or empty areas
- A clear connection to Piet Mondrian’s artwork
Try not to make every rectangle the same size.
(Optional) Step 9: Animate Your Mondrian
- At frame 1 → press I → Location/Scale/Color.
- At frame 20 or 30 → move, scale, or recolour the cube.
- Press I again.
👉 Now your cube will change over time, creating a moving Mondrian pattern.
🖱️ Commands You’ll Use Today
- Shift + A → Add new object (Cube, Plane, etc.)
- G → Move object (G + X/Y/Z for axis)
- S → Scale object (S + X/Y/Z for axis)
- Shift + D → Duplicate object
- Z → Material Preview → See colours
- I → Insert keyframe (Location, Scale, Colour)
- 0 (Numpad) → Camera view
- N → Opens the side panel (View → Lock Camera to View)
- MMB (Middle Mouse Button) drag → Rotate the view
- Shift + MMB drag → Pan the view
- Scroll Wheel / Ctrl + MMB drag → Zoom in/out
📝 Reflection & Evaluation Guidance
When you finish your Mondrian cube task, write one or two paragraphs for each section below. Use the questions to guide your writing. The options in brackets are examples only – you should write your own ideas in full sentences.
1. Describe
- What did you make?
- How did you change the cubes? (e.g. [scaled all sides] [stretched on X/Y/Z axis])
- Which colours did you use and why? (e.g. [red] [blue] [yellow] [black] [white])
2. Analyse
- How is your work similar to Mondrian’s style? (e.g. [grid layout] [repeated colours] [bold contrasts])
- Where do you see patterns in your work? (e.g. [repeated cubes] [repeated colours] [animation movement])
- How do you see repetition? (e.g. [same sizes] [duplicated cubes] [repeated positions])
3. Evaluate
- What works well in your outcome? (e.g. [layout] [colour contrast] [balance] [animation])
- What could be improved next time? (e.g. [positioning] [timing] [animation smoothness] [scale changes])
- Did you find anything difficult? (e.g. [shortcuts] [adding materials] [camera movement])
4. Personal Reflection
- What did you enjoy most about the task? (e.g. [colouring] [scaling] [animating])
- What new skills did you learn? (e.g. [scaling one axis] [adding materials] [keyframes] [camera lock to view])
- How does your work connect to “Patterns and Repetition”? (e.g. [repeated cubes] [repeated colours] [visual rhythm] [grid-like layout])
 Art & Design @ West Thames College