PROJECT 1
MAKING & UNMAKING
Important Dates & Resources
Project Brief
| Project Launch | w/c 5th Oct 2026 |
| Formative Feedback | w/c 2nd Nov 2026 |
| Target Completion | — |
| Summative Feedback | w/c 9th Nov 2026 |
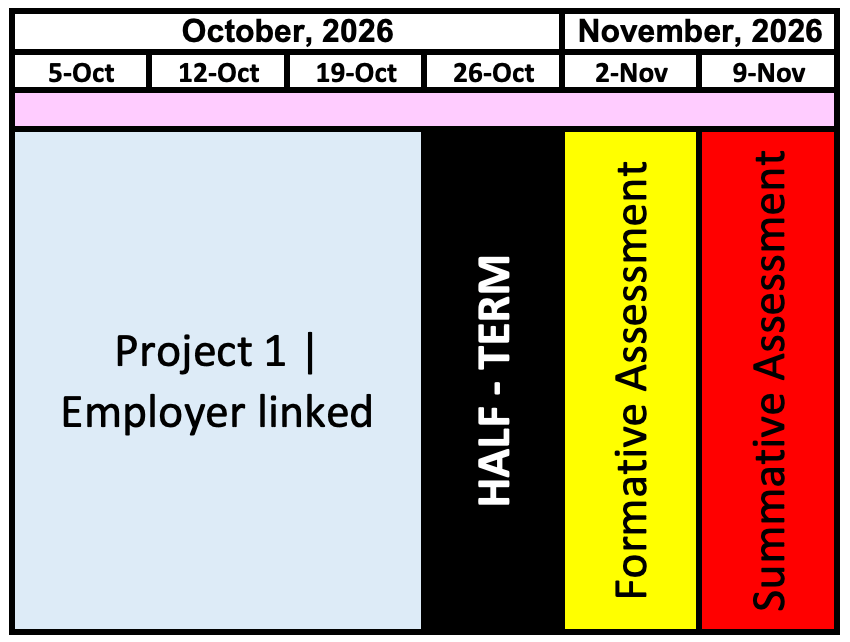
WEEK 6 – WC/12th Oct
This week, while part of the group is working in the photography studio, some of you will stay in the classroom and experiment with blur, layer masks and adjustment layers in Photoshop.

In Lesson Tasks
Photoshop Blur Experiments
The aim is to learn how blur can be applied selectively, rather than simply blurring the whole photograph.
Find a high-quality portrait photograph using a stock-image website or an image from the college/gallery resources.
Choose an image that has:
- A clear person as the main subject
- The face clearly visible
- Good image quality
- Some space/background around the person
- Interesting colour, clothing, lighting or pose
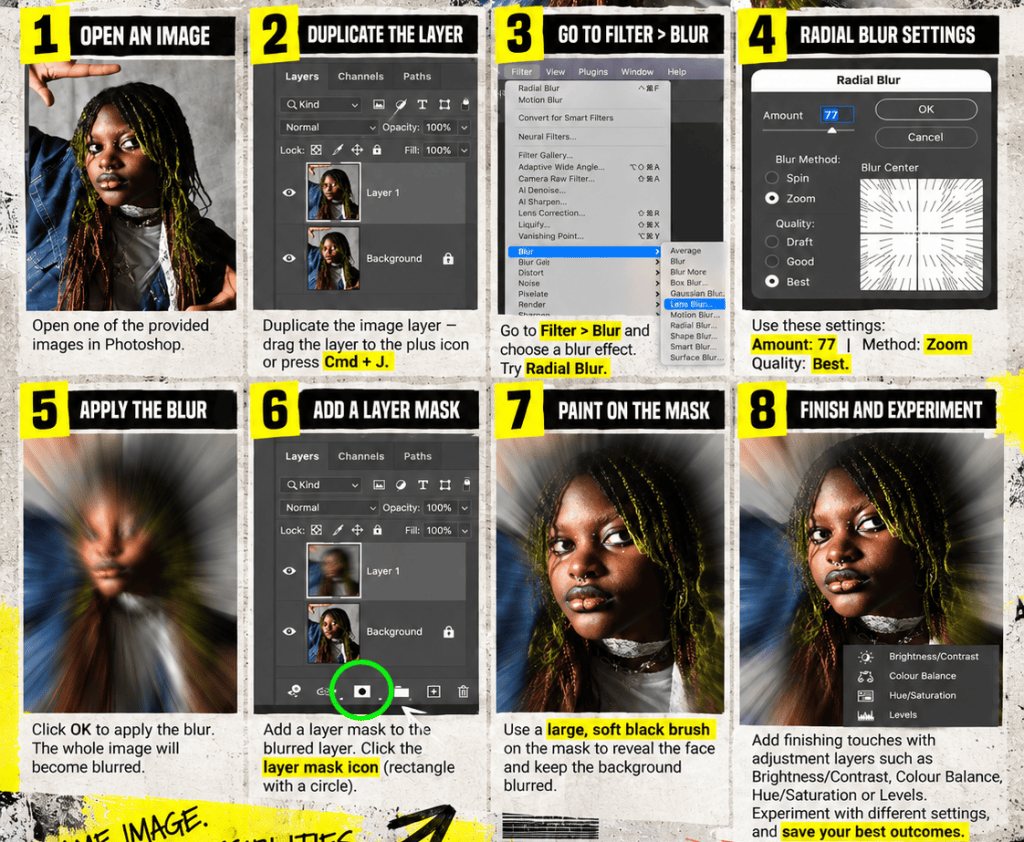
Step 1 – Open and duplicate the image
Open your photo in Photoshop.
Before making any changes, duplicate the original layer so you always have an untouched photograph underneath.
You can do this by:
- Dragging the layer onto the + icon in the Layers panel, or
- Pressing Command + J.
You should now have two copies of the photograph.
Step 2 – Experiment with Blur
Make sure the top duplicated layer is selected.
Go to:
Filter → Blur
Experiment with different blur options and observe how each one changes the photograph.
Start by trying Radial Blur:
- Amount: around 77
- Blur Method: Zoom
- Quality: Best
You can change the settings and test different amounts. There is no single correct result — experiment to see what works best with each photograph.
Step 3 – Bring the face back into focus
At the moment, the entire photograph will be blurred. We want to keep some areas sharp.
With the blurred layer selected, click Add Layer Mask in the Layers panel.
Select the Brush Tool and choose:
- A large brush
- Soft edges
- Black as your foreground colour
Make sure you are painting on the layer mask, not directly onto the photograph.
Paint over the face or another important area. Painting with black will hide the blurred layer and reveal the sharp original photograph underneath.
You can change the brush size as you work to control the effect.
Step 4 – Develop the image
Once you have created the basic blur effect, experiment with Adjustment Layers to change the mood and appearance of the image.
You could try:
- Brightness / Contrast
- Hue / Saturation
- Colour Balance
- Levels
- Black & White
- A Solid Colour layer
- Changing the opacity of layers
Try different combinations rather than applying every effect to every photograph.
WEEK 6 – WC/5th Oct
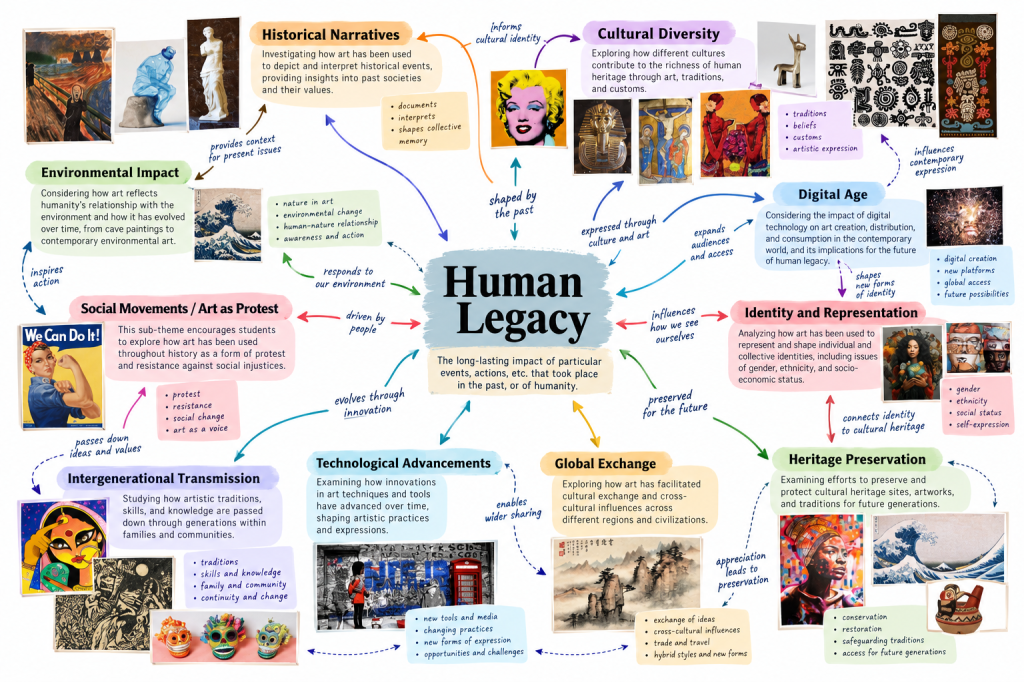
This week, you will explore the theme Making & Unmaking by creating a visual mind map on Milanote. You will use images, keywords, artists, materials, techniques and connections to investigate different meanings of the theme and begin identifying ideas that could inspire your own artwork.
In Lesson Tasks
Task 2: Create a Visual Mind Map on Milanote – Exploring ‘Making & Unmaking’
Objective
Create a visual mind map on Milanote to explore the Project 1 theme Making & Unmaking.
Your board should combine keywords, short explanations, images, artists, materials, techniques and connections between ideas. The aim is to help you discover different directions you could explore later in the project.
Instructions
- Open Milanote
- Go to Milanote.com and log in or create a free account.
- Create a new blank board.
- Title your board: Making & Unmaking – Visual Mind Map.
- Double click on that board to open it.
- Start with the main theme
- Place MAKING & UNMAKING note in the centre of your board.
- Underneath, add a simple explanation in your own words of what you think the theme could mean.
- Create different branches
Add different ideas around the main theme. You could explore:
Making / Creating – building, constructing, assembling, producing
Unmaking / Destruction – breaking, cutting, tearing, dismantling, removing
Transformation – changing something into something new
Repair and Restoration – fixing, rebuilding, mending
Materials – paper, fabric, clay, wood, plastic, digital materials
Growth and Decay – nature, ageing, erosion, decomposition
Memory and Traces – marks, remains, fragments, things left behind
Recycling and Reuse – turning old materials into something new
Process – how an artwork changes while it is being made
Technology and Digital Unmaking – glitch, distortion, deleting, editing and manipulating images
You do not need to use every suggestion. Add your own ideas too. - Develop each branch
Do not just write one word. Add smaller ideas around each section.Think about questions such as:
- What could be made?
- How could something be unmade?
- Can destroying something actually create something new?
- What happens when something is cut, broken, erased or changed?
- Can something damaged be repaired?
- What materials could you experiment with?
- What techniques could communicate this idea?
- What artists or designers could relate to it?
- Add techniques and experiments
Include practical ideas you could potentially try, such as:
Collage – tearing – cutting – layering – stitching – weaving – painting over– erasing – sanding – breaking – rebuilding –photography – digital distortion – glitch – repetition – scanning – manipulating images - Use lots of visuals
This should be a visual research board, not a page of writing. Add:
Artwork – Photography – Textures – Objects – Materials – Colours – Artist references
Interesting examples of making, breaking, repairing or transforming
Try to have an image beside most of your main ideas. - Show the connections
This is important. Use arrows and lines to connect ideas that relate to each other.
For example:
Destruction → Transformation
Damage → Repair → Making
Nature → Decay → Unmaking
Old materials → Recycling → New artwork
Technology → Glitch → Distortion
Some ideas should connect to more than one section. Your board should look like a network of ideas rather than separate boxes. - Final check
Before submitting, make sure your board has:- Making & Unmaking clearly in the centre
- At least 8 main branches
- Short explanations and keywords
- Plenty of images
- Materials and techniques you could experiment with
- Artist/artwork ideas to investigate
- Arrows connecting related ideas
- At least 3 connections between different branches
- Your own ideas, not only the examples given above
The finished board should help you answer the question: “What could Making & Unmaking mean for my own artwork?”
Task 2: Artist Research – Fragmented Portraits
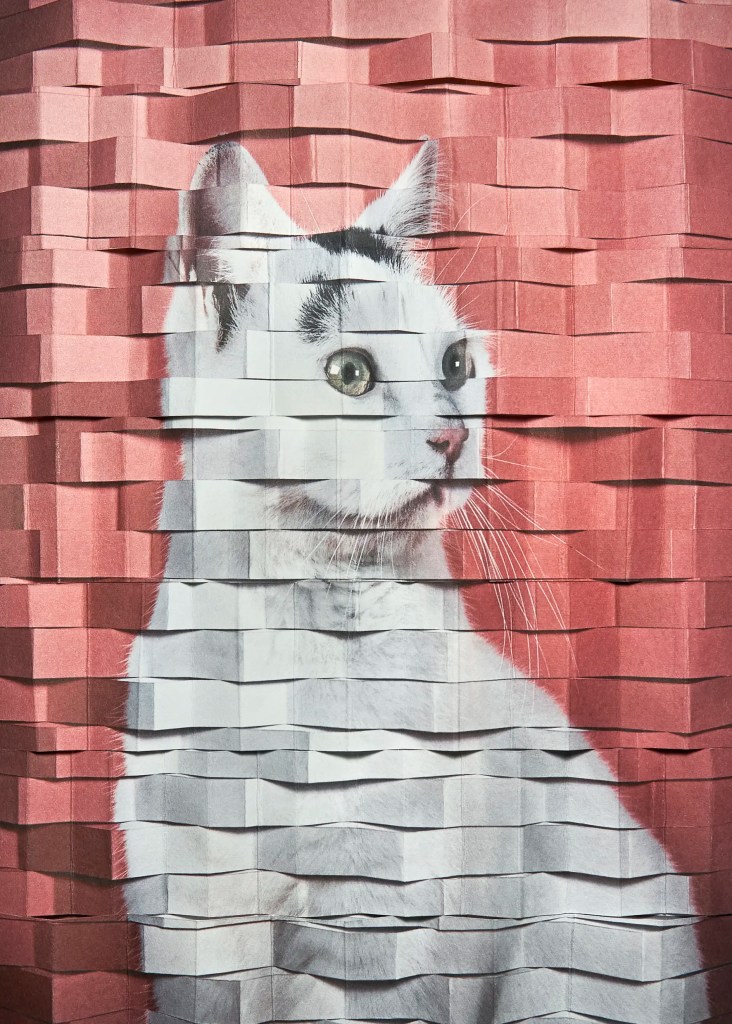
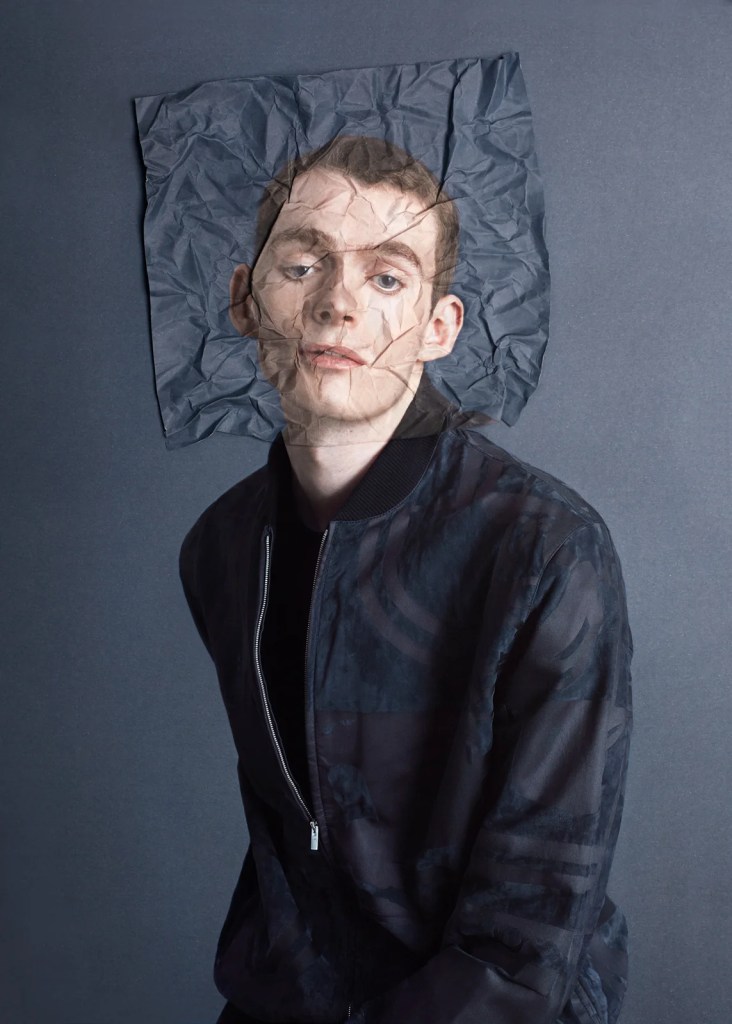
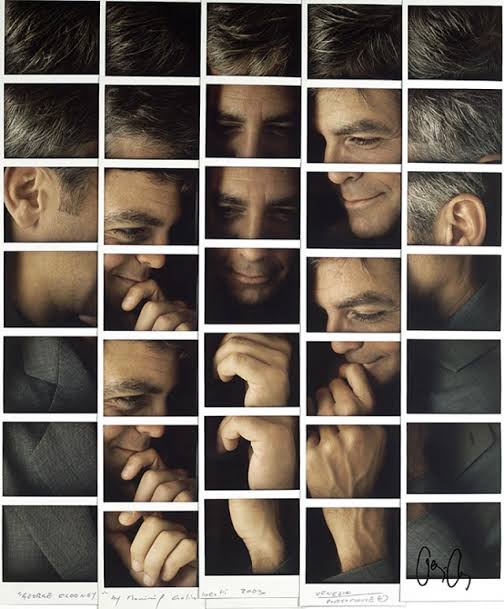
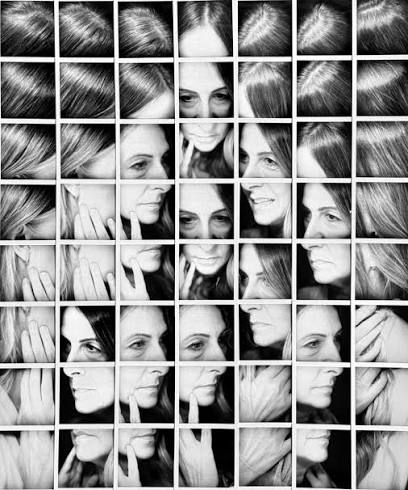
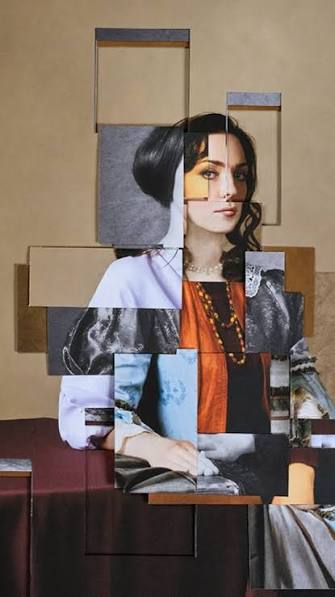
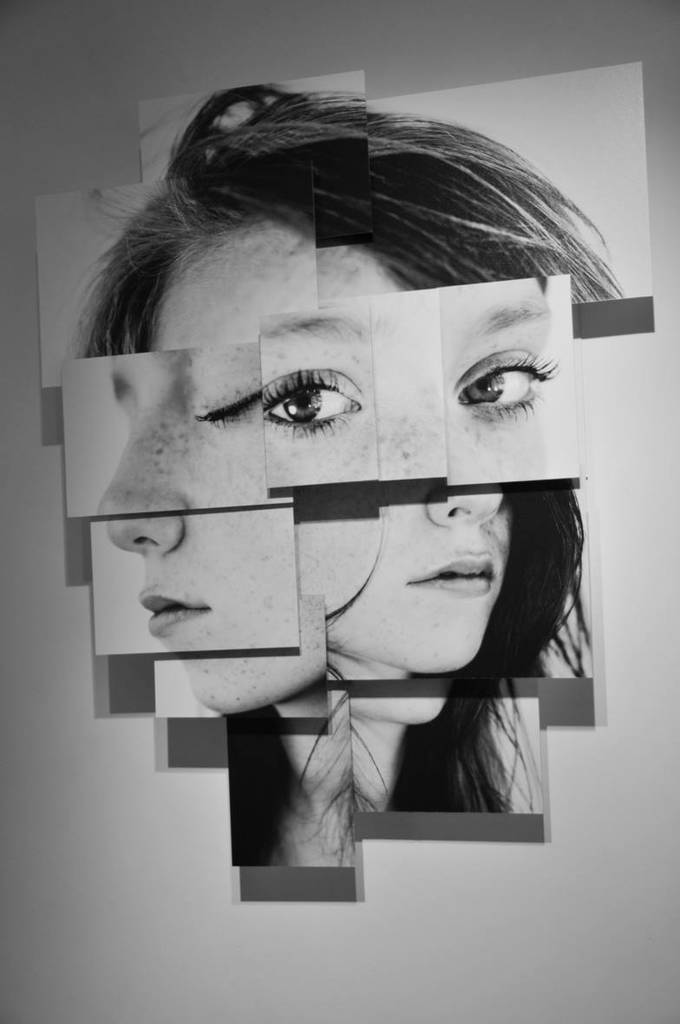
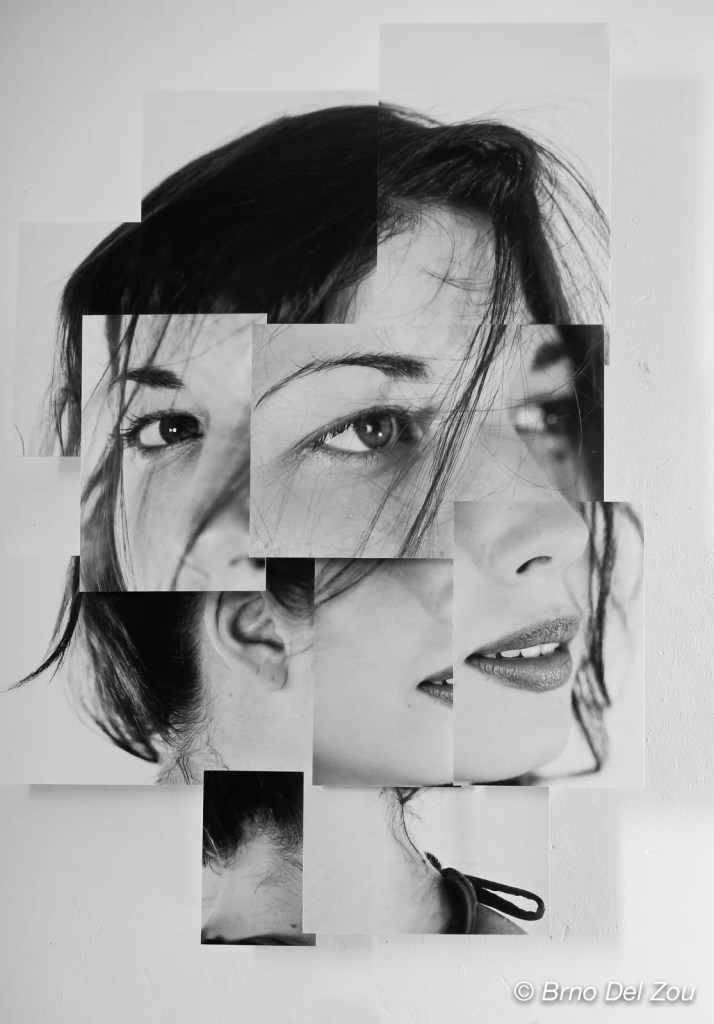
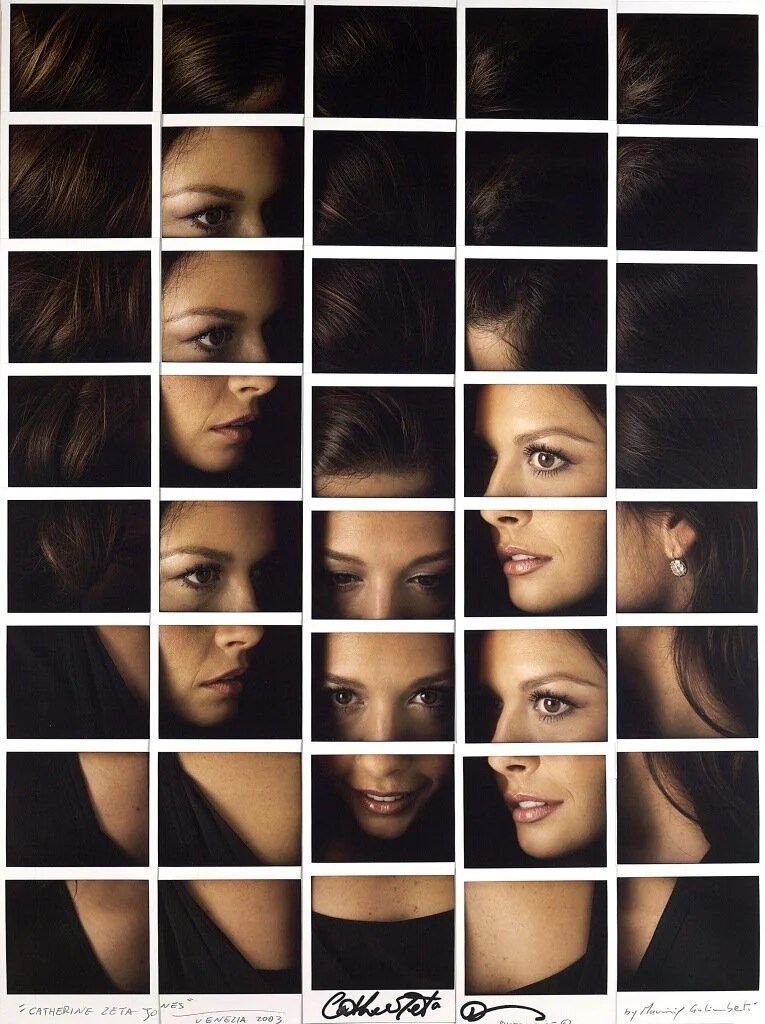
Before creating your own fragmented portrait, you will investigate three artists who take traditional portrait photography and reconstruct it in different ways:
Maurizio Galimberti • Brno Del Zou • Alma Haser
Although their processes are different, all three artists explore fragmentation, reconstruction, multiple viewpoints and identity. Galimberti builds photographic mosaics from multiple instant photographs, Haser physically manipulates and reconstructs photographs through techniques including folding and collage, while Del Zou’s Photosculptures use layered fragments of the face photographed from different viewpoints. mauriziogalimberti.com
The purpose of this research is not to write long biographies. Your research should be mainly visual and help you decide how you will photograph and construct your own portrait.
Part 1 – Research the three artists
Create a separate section on your blog for each artist.
For each artist:
1. Introduce the artist
Write a short introduction explaining:
- Who they are.
- What type of work they create.
- How they create or manipulate their portraits.
Keep this short — approximately 50–80 words.
2. Collect 6 examples of their work
Present at least 6 images in a gallery.
Choose images that clearly show:
- Fragmentation
- Cropping
- Different viewpoints
- Layering
- Repetition
- Changes in scale
- Reconstruction of the face
Do not choose six images that all look almost identical.
3. Analyse 2 artworks
Choose your two strongest examples from each artist and analyse them visually.
For each artwork, consider:
- Composition: How are the different parts positioned?
- Cropping: Which parts of the face have been isolated?
- Scale: Are some features larger or smaller than others?
- Viewpoint: Can we see the person from different angles at the same time?
- Layering: Do sections overlap or sit at different depths?
- Repetition: Are any features repeated?
- Colour: Is the work colourful, neutral or black and white?
- Focus: Which part of the portrait attracts your attention first?
- Effect: How does fragmenting the portrait change the way we see the person?
You do not need to answer these as separate questions. Use them to help you write a short visual analysis.
Part 2 – Compare the artists
After researching all three, create the heading:
Comparing the Artists
Show one artwork from each artist next to each other.
Then explain:
What do all three artists have in common?
Think about portraiture, fragmentation, reconstruction and showing different viewpoints.
What is different about their work?
Look particularly at shape, scale, layering, materials, depth and composition.
Which artist’s approach interests you the most, and why?
Aim for approximately 100 words.
Part 3 – Use the research to plan your own work
Create the heading:
Ideas for My Fragmented Portrait
Your research must now influence your own photoshoot and Photoshop work.
Choose at least one idea from each artist that you could experiment with.
For example:
Galimberti: several photographs arranged together like a mosaic. His photographic mosaic technique uses separate instant photographs as individual pieces of a larger image. mauriziogalimberti.com
Del Zou: different-sized sections of the face photographed from several angles and layered together.
Haser: hiding, transforming or reconstructing areas of the face using geometric forms, layers or unusual textures. Her Cosmic Surgery series multiplies and distorts facial features through intricate constructed portraits. Almahaser
Finish with a small visual mood board showing the direction you want to explore.
Evidence required on your blog
Heading: Artist Research – Fragmented Portraits
You should have:
Maurizio Galimberti – 6 images + analysis of 2
Brno Del Zou – 6 images + analysis of 2
Alma Haser – 6 images + analysis of 2
Comparing the Artists – 3 images + comparison
Ideas for My Fragmented Portrait – visual mood board + ideas for your own work

